Algonquin Park: Algopedia: How To Build A DIY Mega Pulk

As with most things in life, once you’ve finished a project you think of a few dozen things you should have done to make it better. After using my original pulk design on a few winter camping trips I came to the conclusion that it just wasn’t long enough.
When you have a shorter pulk there are at least two problems, the first is you can’t carry as much gear and the second is that you have to pile items higher. This height has the tendency to make your sled tip over.
After again looking at “real” pulks![]() (pricey) and discussing with a couple buddies about making one with fancy UHMWPE sheets (still costly), I decided to go all Red Green again.
(pricey) and discussing with a couple buddies about making one with fancy UHMWPE sheets (still costly), I decided to go all Red Green again.
Taking my original experience and spending a few minutes thinking things over, I came up with the idea of taking two of the plastic toboggans and slicing/dicing them into one stretched out pulk. So that’s what I did one weekend.
How to build the SmedleyCo Mega-Pulk:
- 1. Get two toboggans.
- 2. Cut the top off one and the bottom off the other.
- 3. Join the two halves together.
- 4. Make feature improvements.
- 5. Attach poles for pulling the pulk.
- 5. Go winter camping!
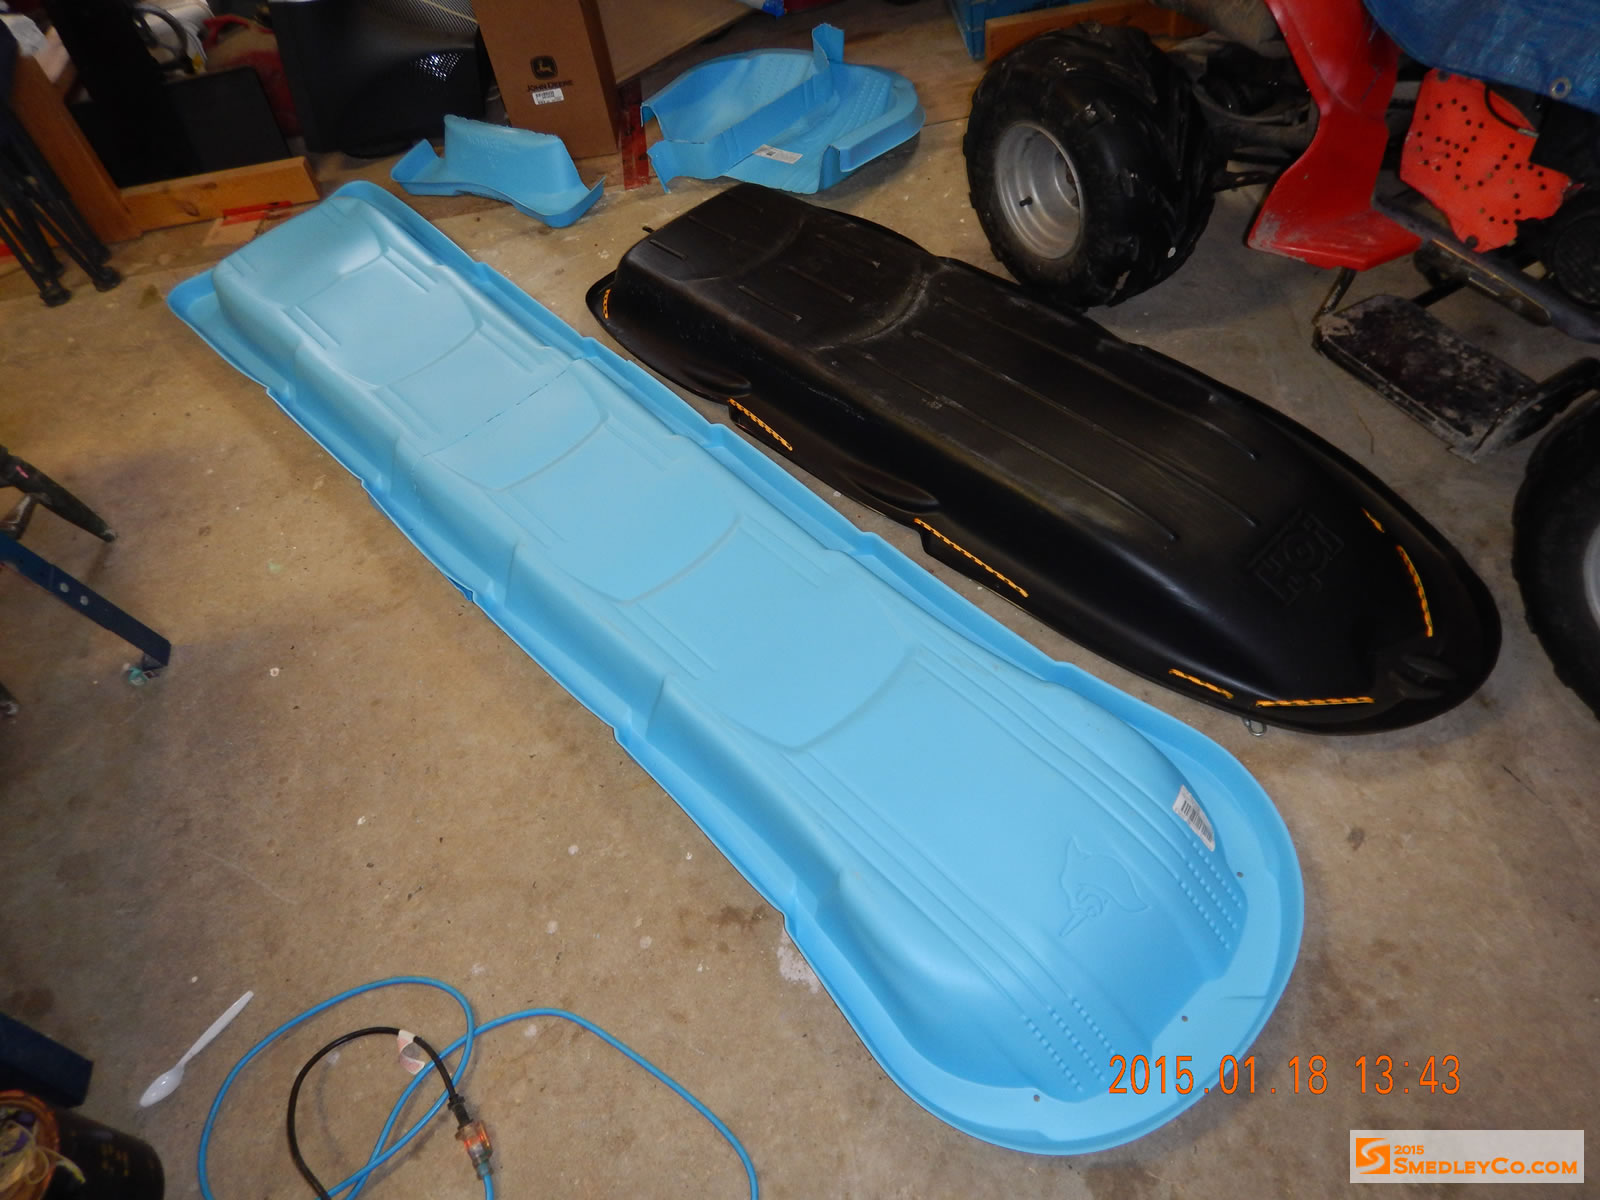
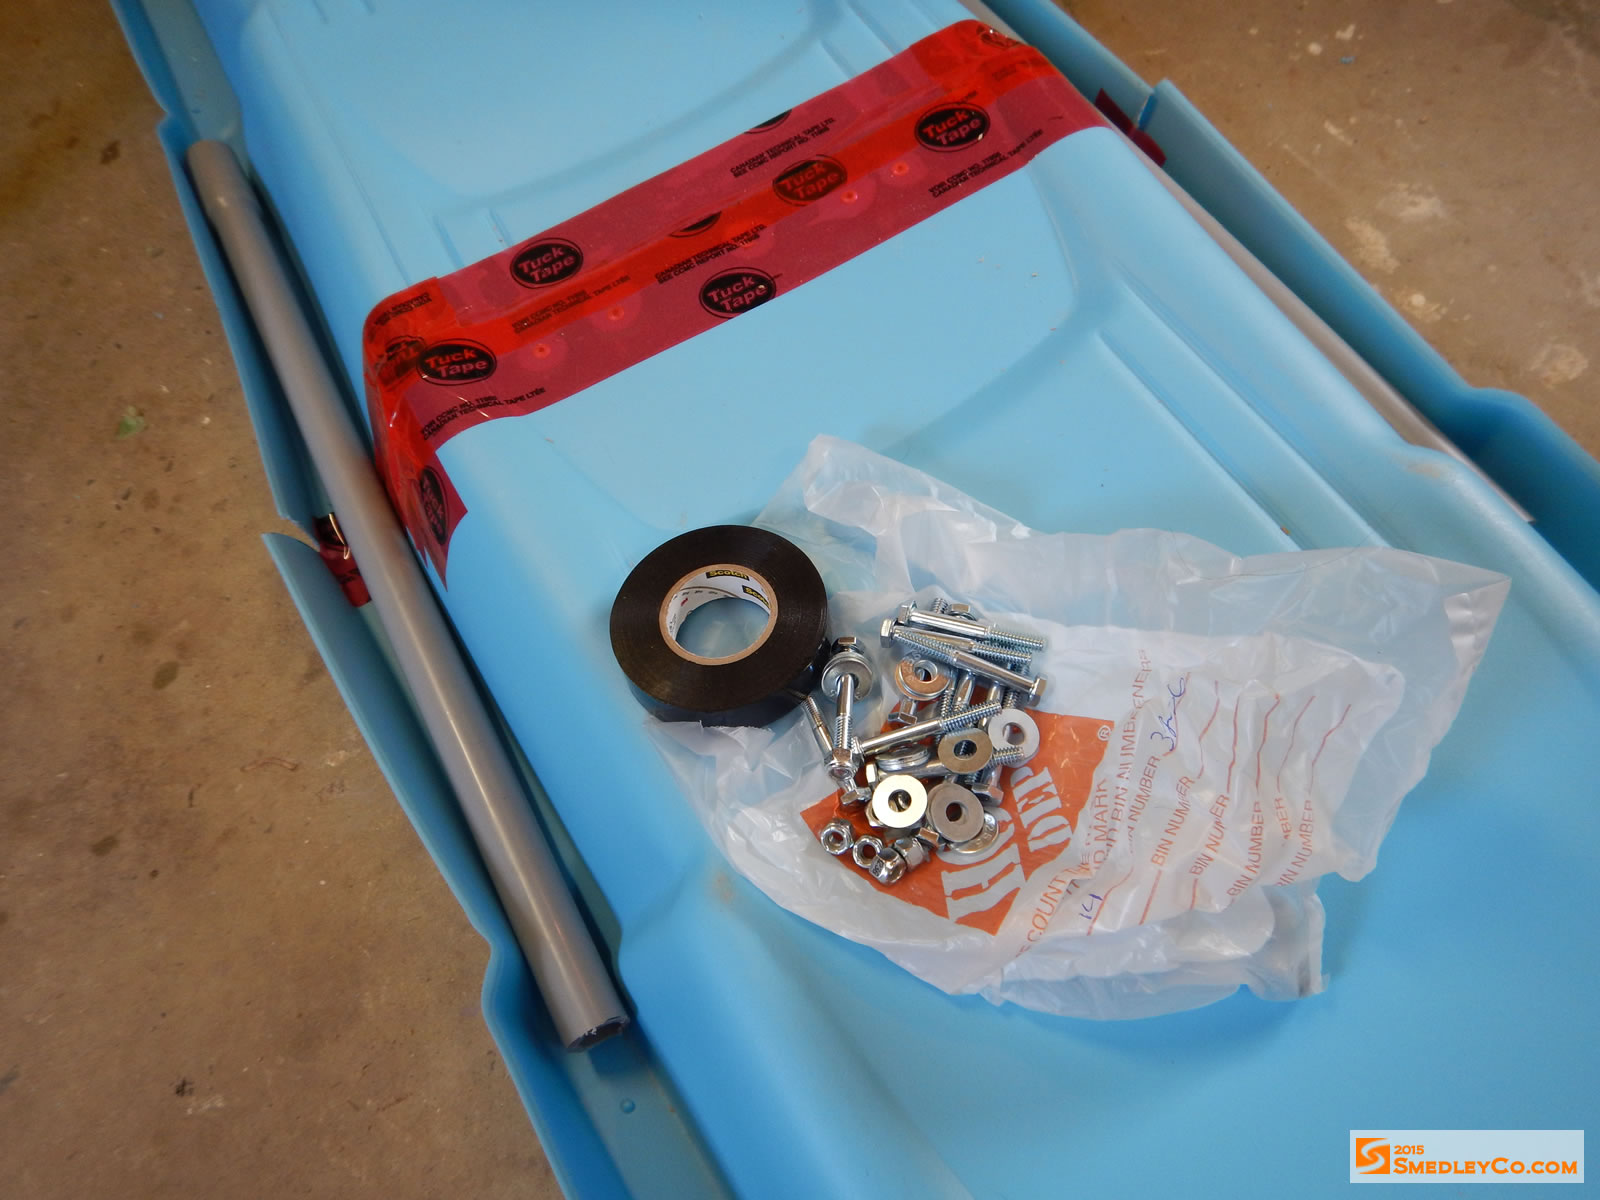
Get Two Toboggans
The five foot long plastic toboggans from any store work great for DIY pulks. I gathered together all my Canadian Tire money and went and bought two. This years models were blue instead of black.
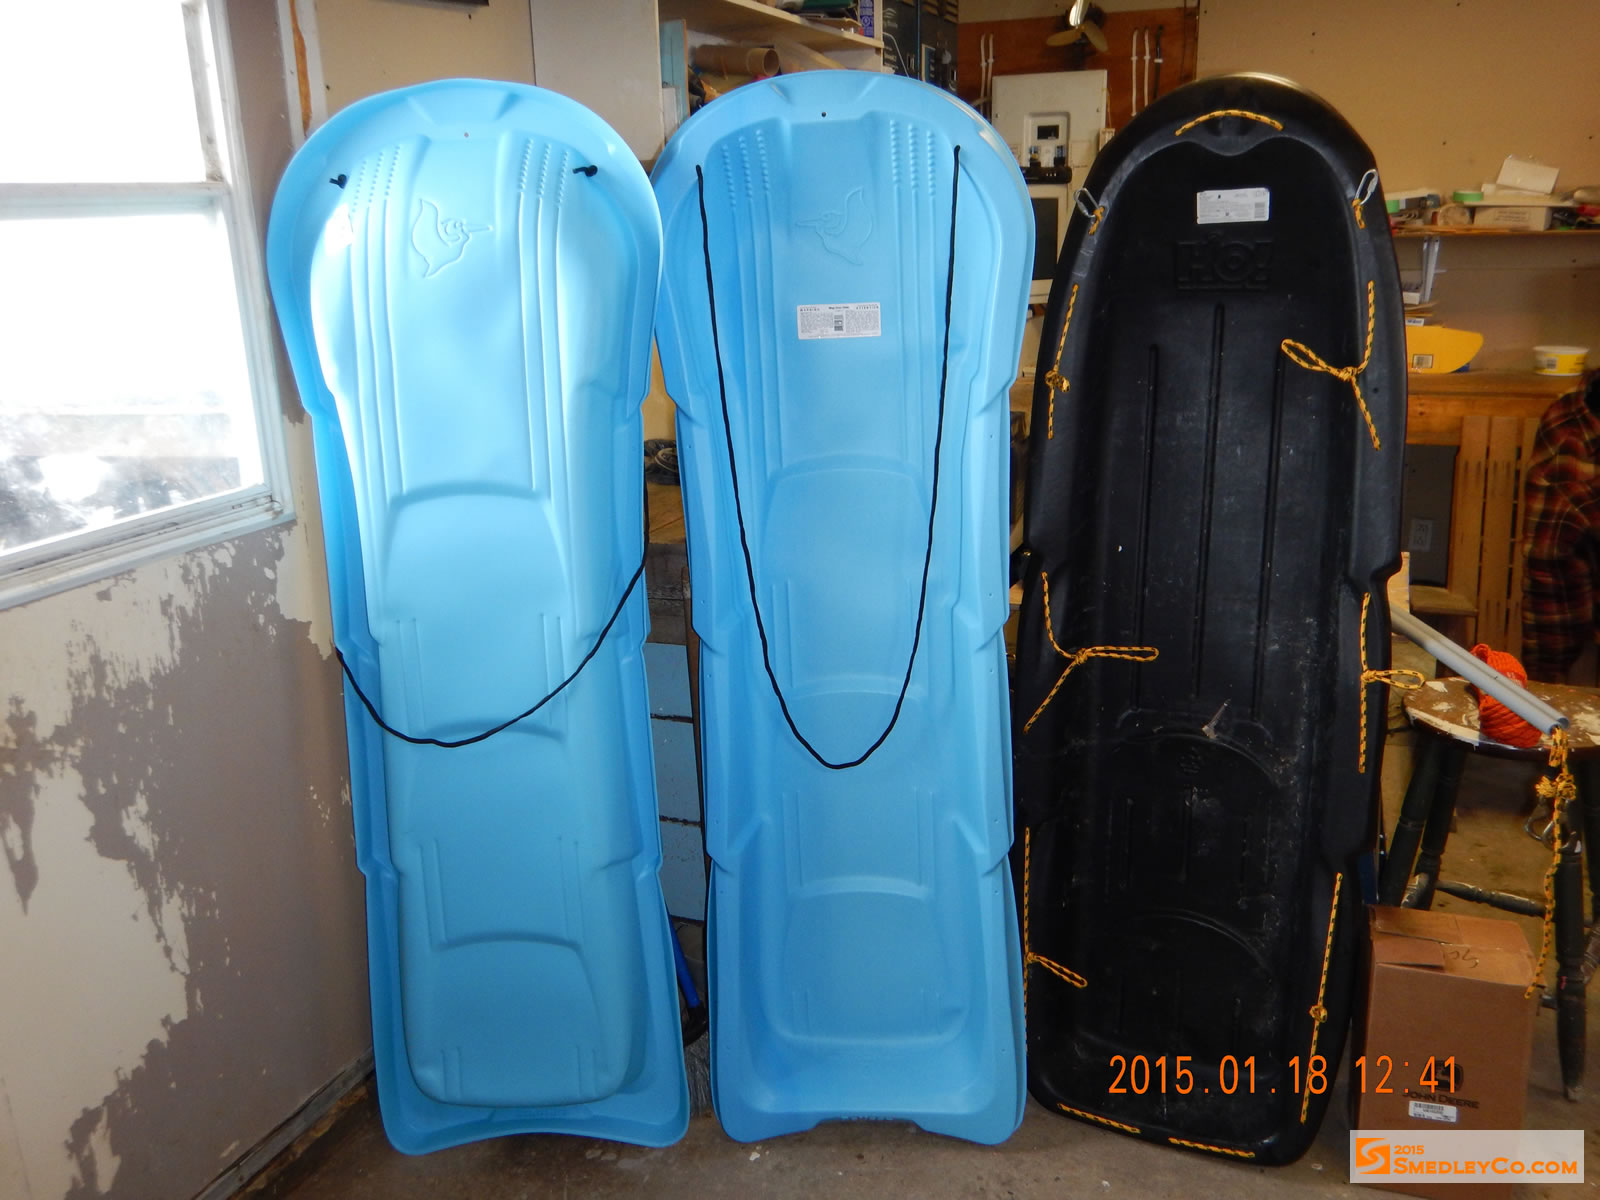
Start with two toboggans. On the right is the Mk1.
Cut the top off one and the bottom off the other
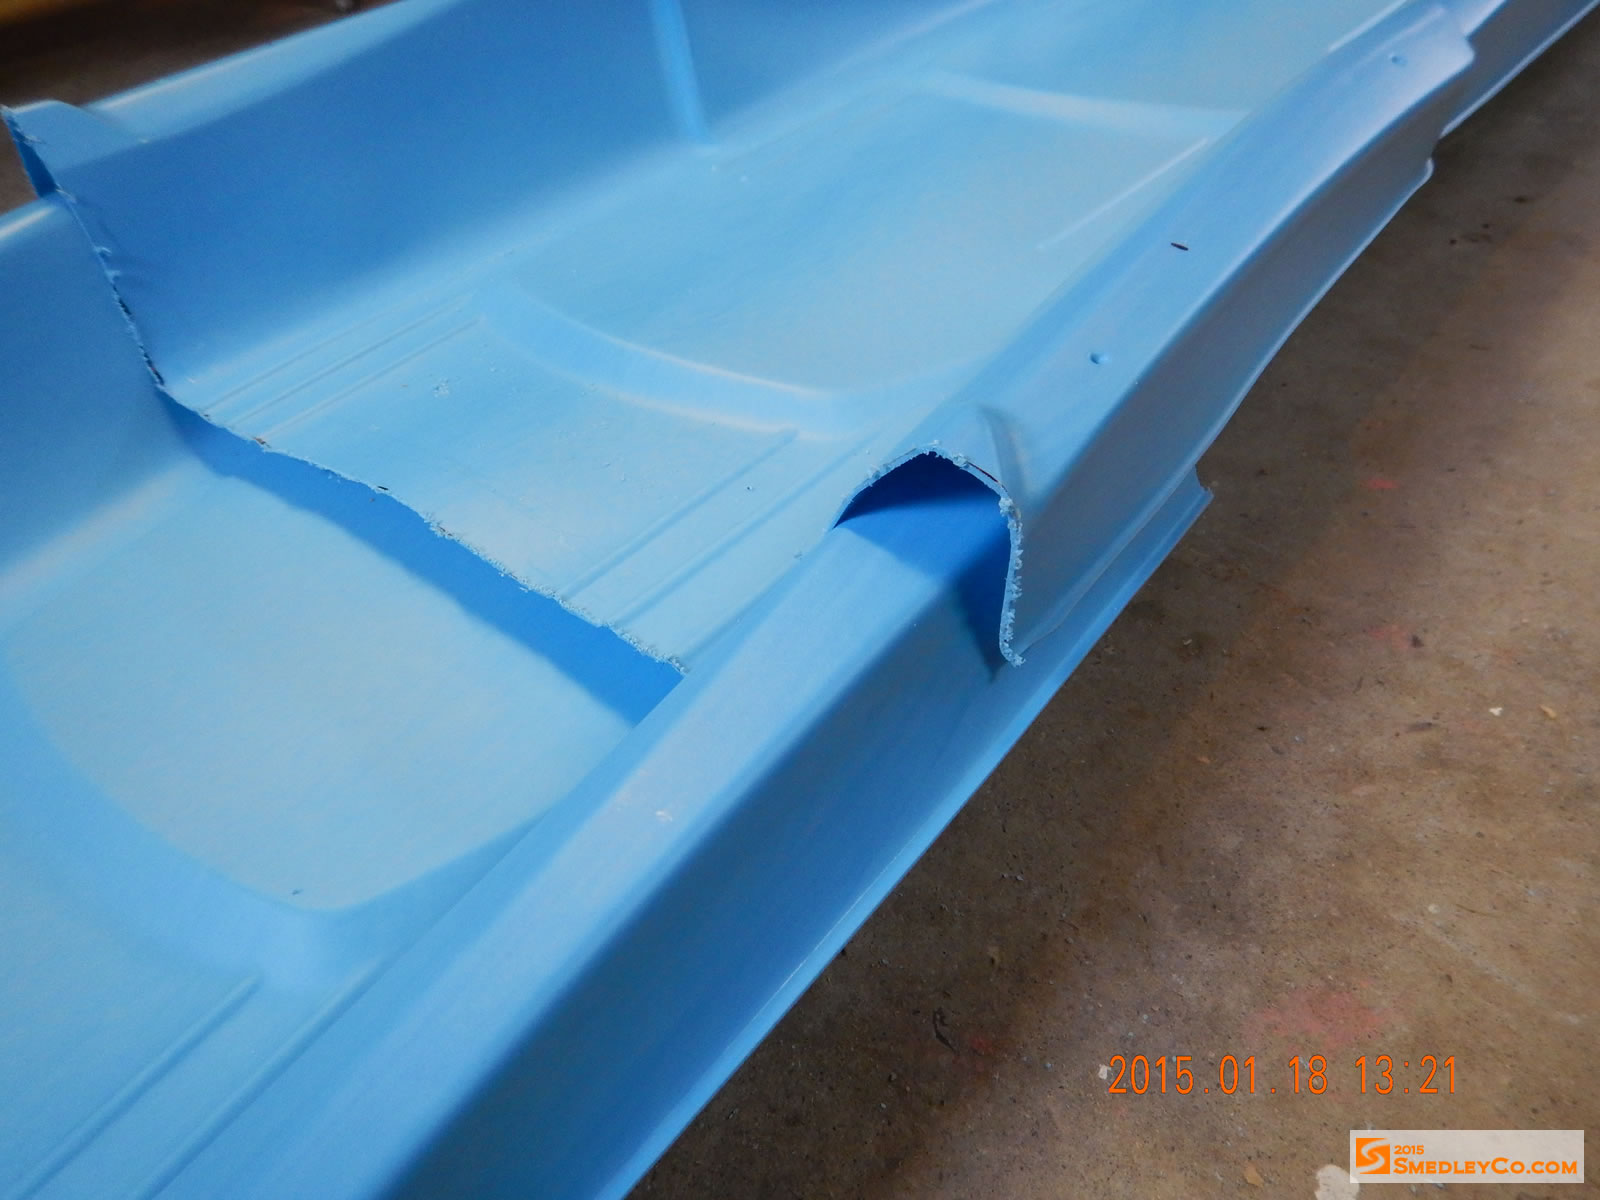
I wanted the longest pulk possible after joining things together, so I started by cutting off the end of one toboggan.
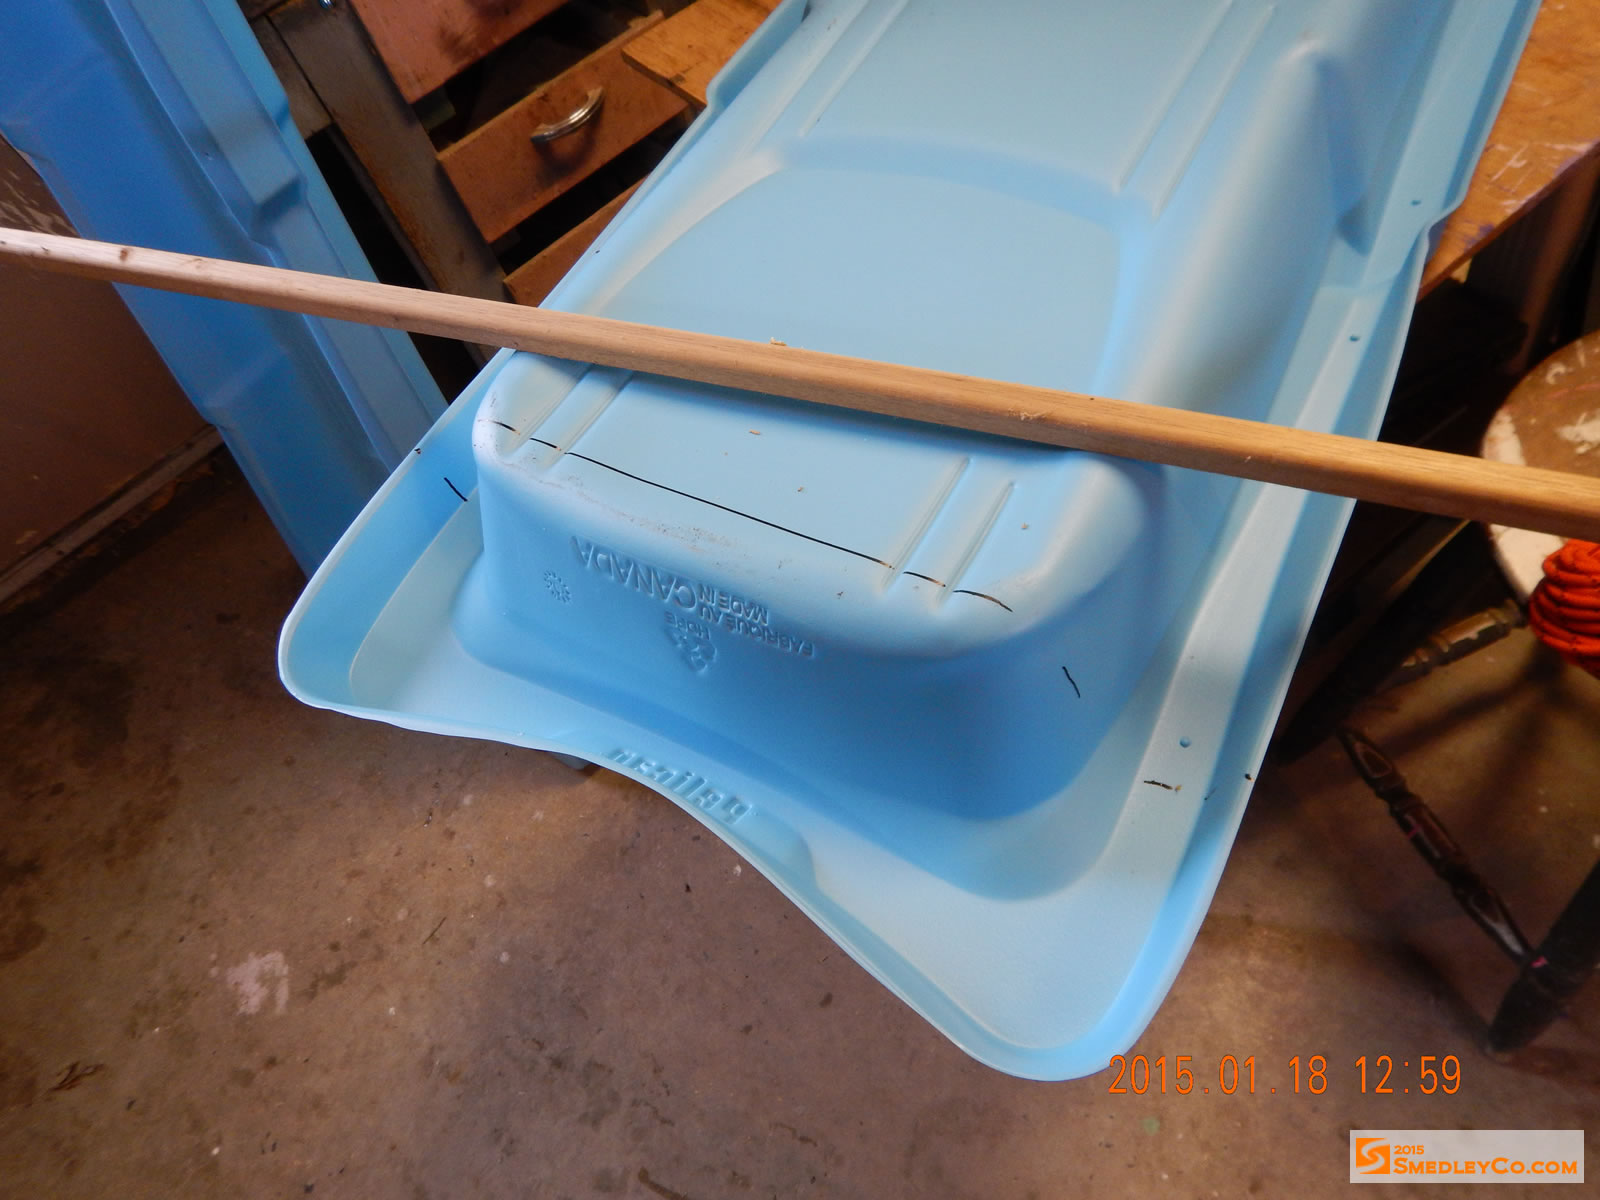
Cut the bottom off one, try to get it straight.
The thin plastic cuts easily.
The idea, obviously, is to have a nice flat bottom for easy pulling, it took some considering to figure out the best point to cut off the top of the second toboggan. The way the toboggan sides and bottom are molded gives certain points where you can align the top and bottom for smoothness. But I also wanted as much length as possible. So after eyeballing several configurations I made my decision and started cutting.
Finding the right spot to cut the second toboggan.

Taking the time to get the right fit.

Measure twice.

Cut once.
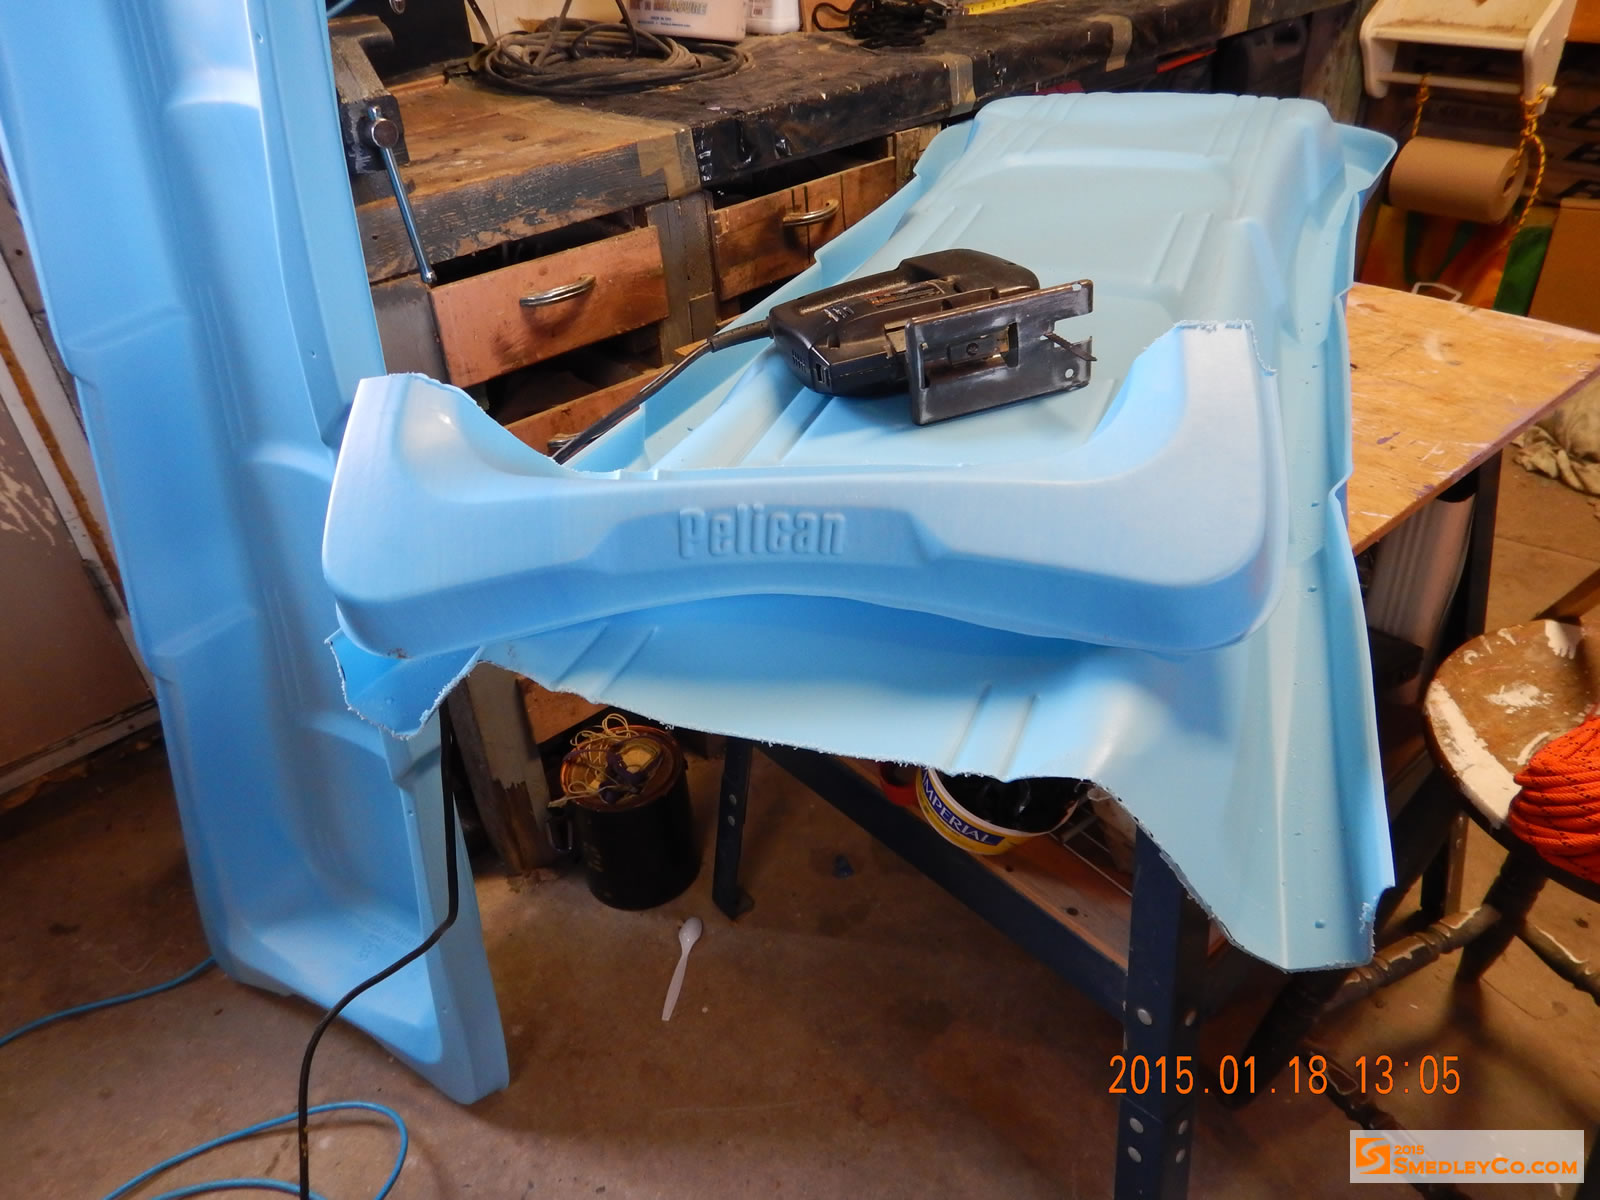
I now had two pulk halves and it was time to figure out how to join them together.
Join the two halves together
After some more experimenting with how the sections were joining together I realized that I was not happy with the fit. There was a bit of a bump in the edge molding and things weren’t aligning as smoothly as I wanted.
Aligning the edges of the pulk.
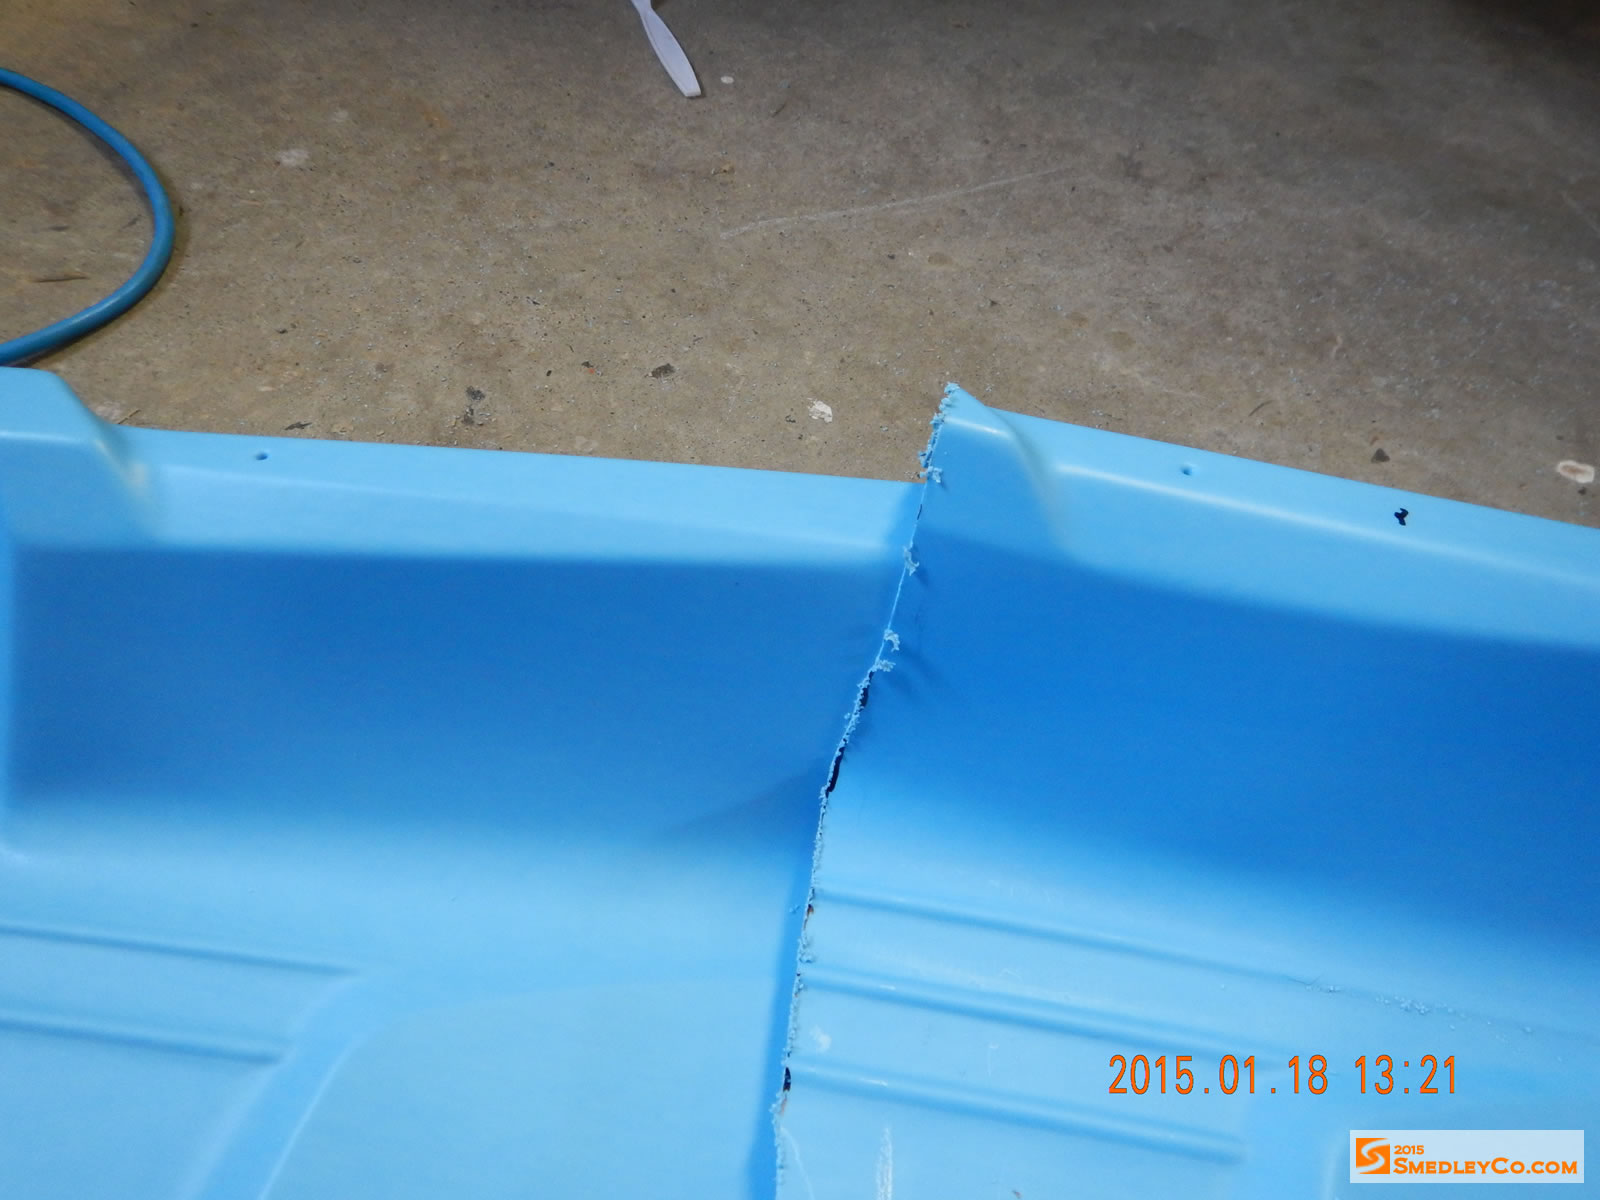
Things were not working out smoothly.
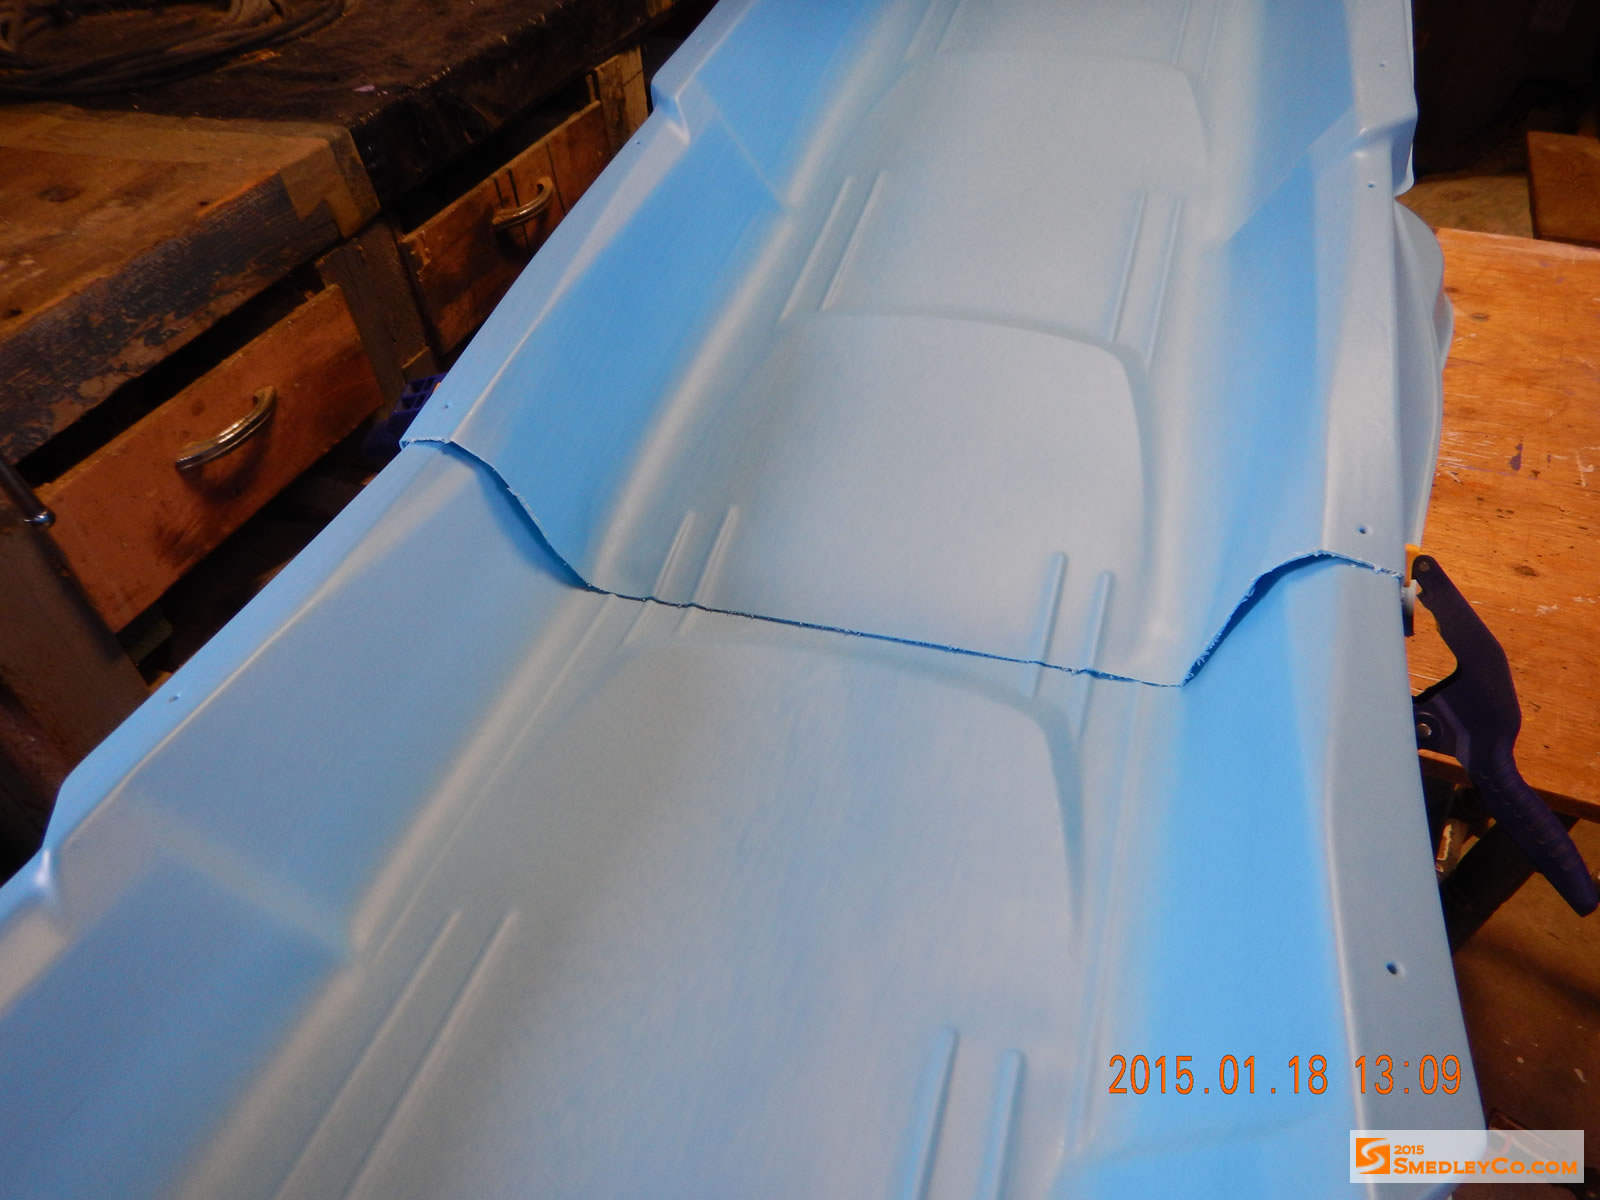
I cut off the top bit of edging as my first attempt to correct this.
A little off the corner was the first modification.
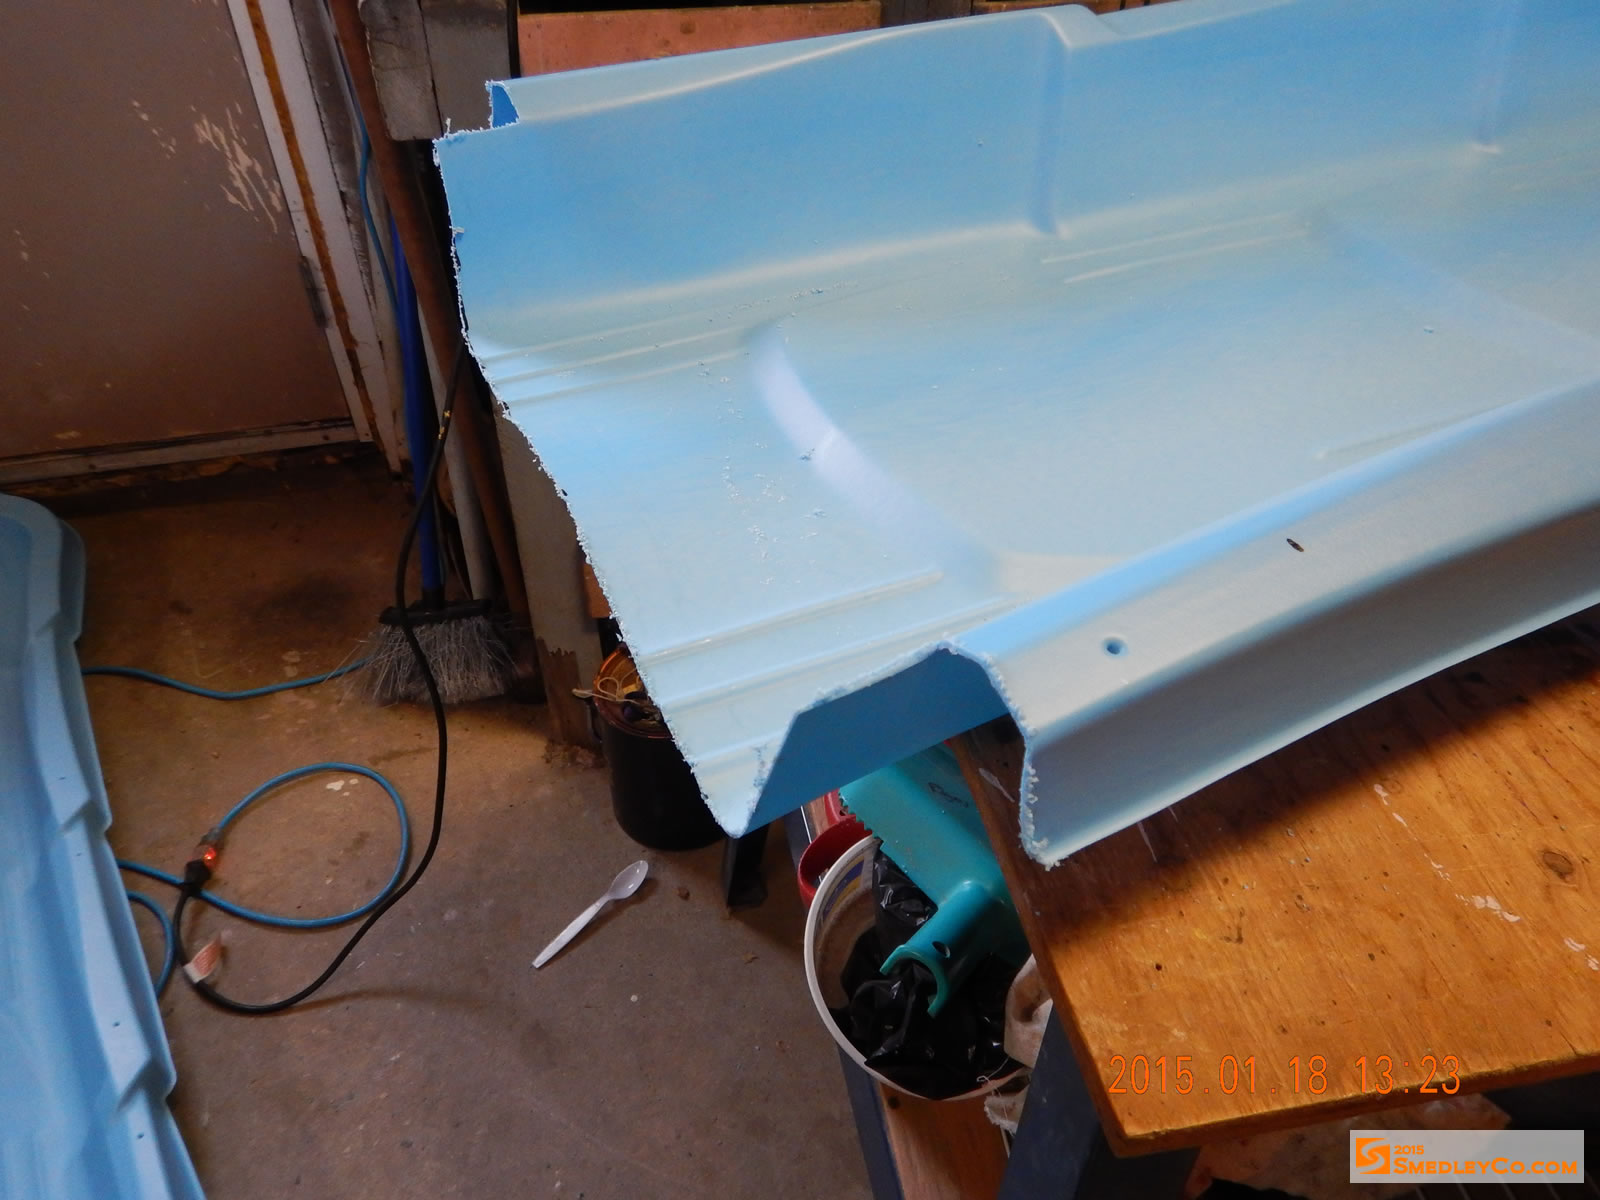
When this still didn’t solve the alignment problem enough I had to sacrifice another few inches of length to get a good fit.
Cutting more off the end of a half to get a good joint.
Looking good, smooth bottom on mega-pulk.
Finally happy with the arrangement, I got to work joining the two halves into a proper pulk. I’m sure there are glues or high-tech adhesives that will join high density polyethylene plastic. I have no idea what they are. However, I do know a guy that has every tool in existence. So I borrowed his rivet gun and planned to use rivets to hold things together.
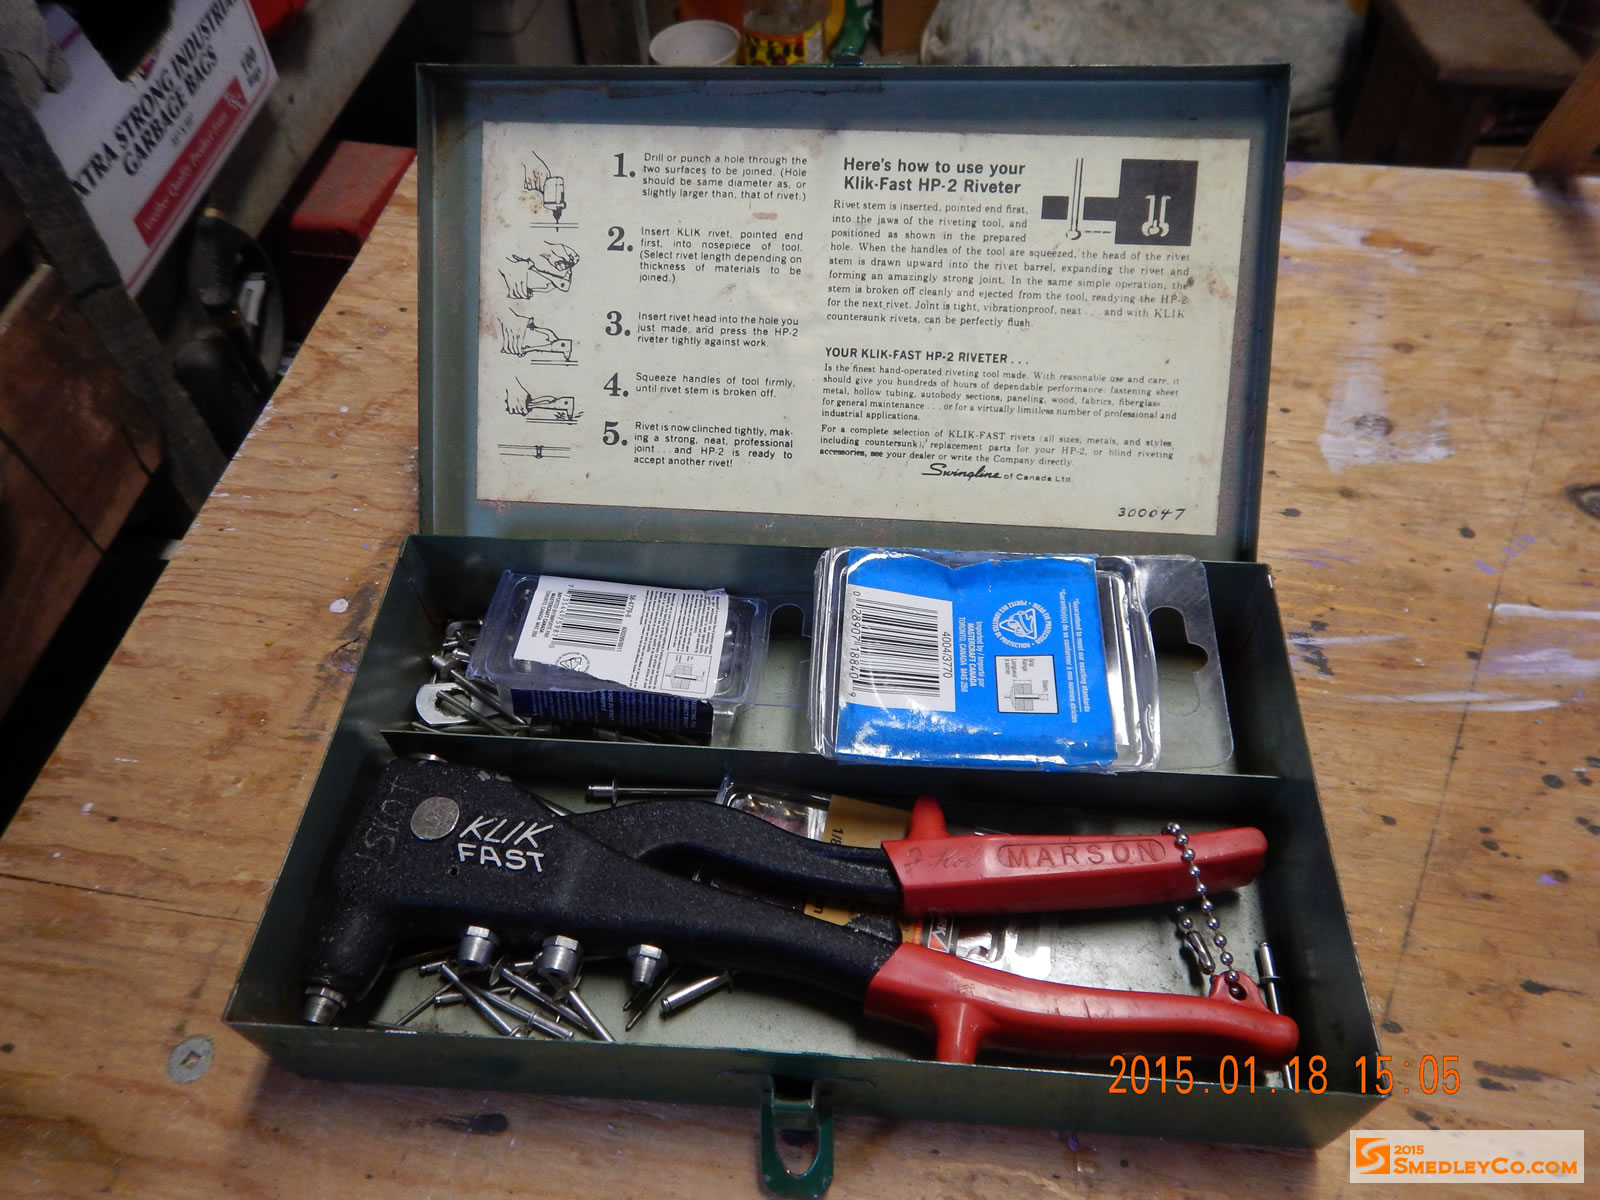
Make sure you have friends you can borrow tools from.

Rivets, seemed like the best way to join the two halves of the pulk.
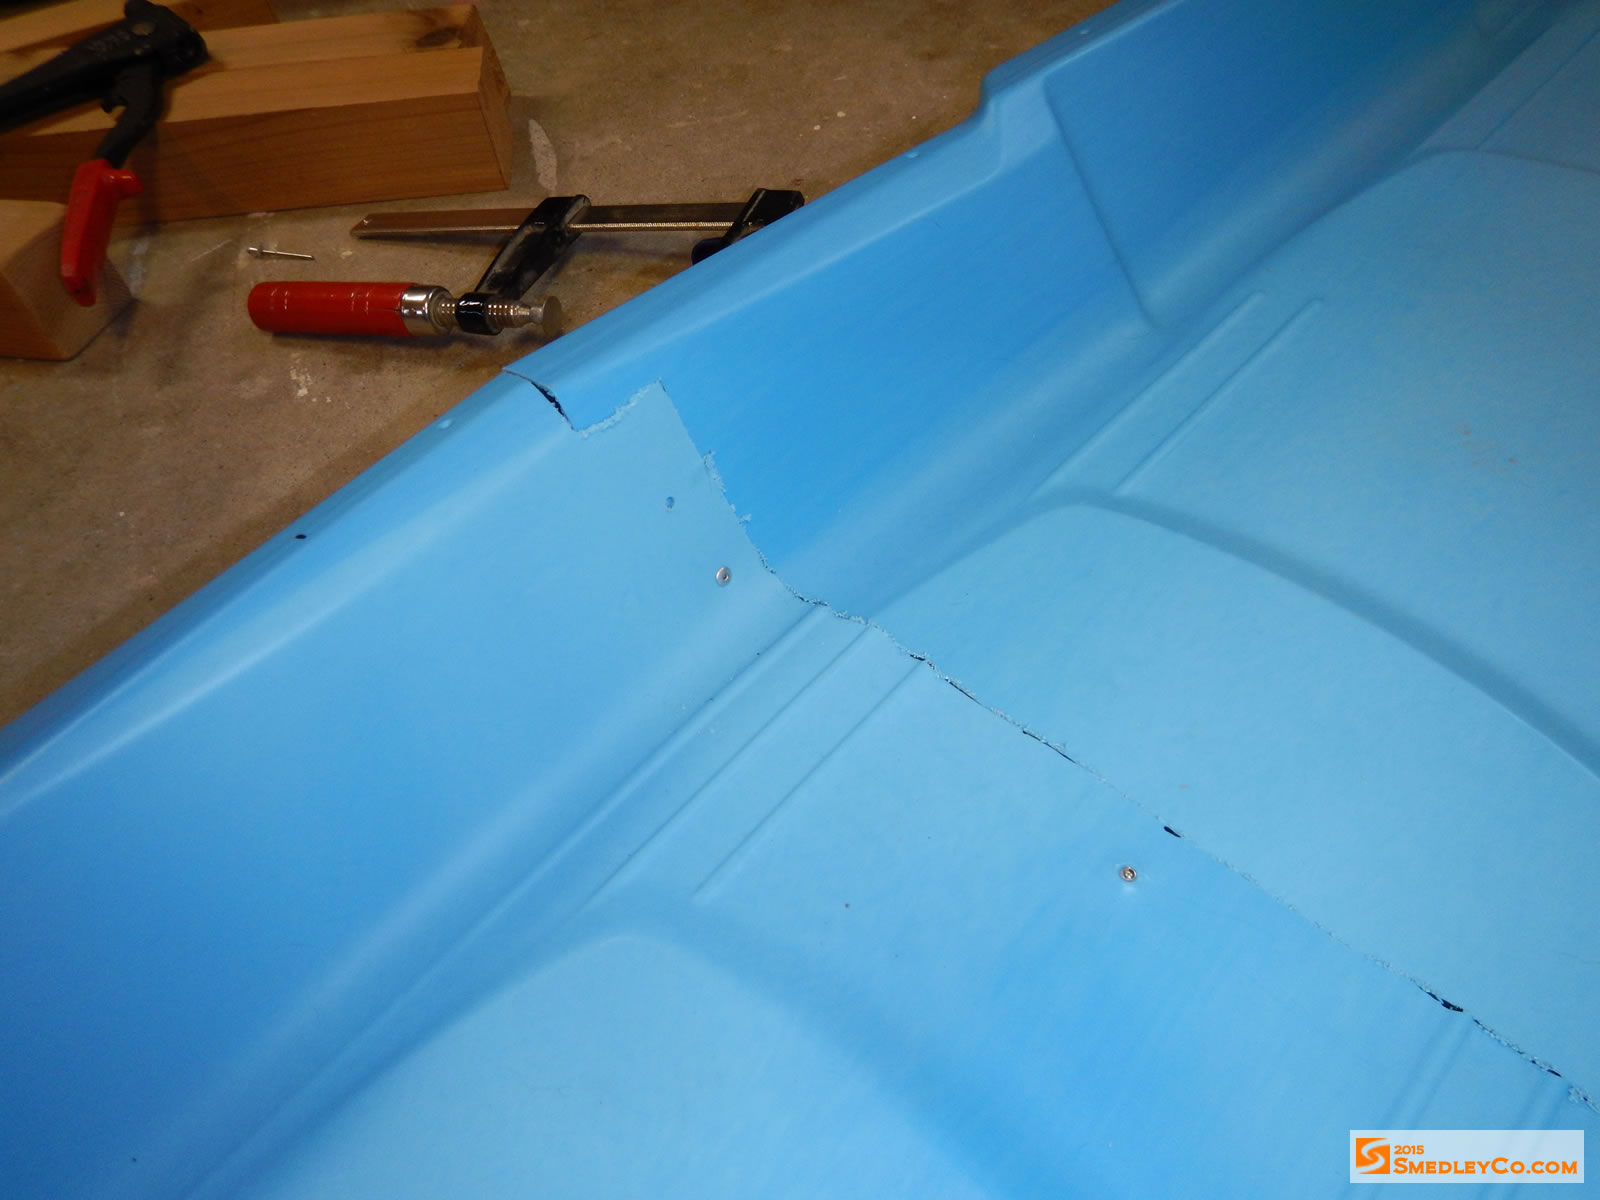
The first rivet went okay, but the second one in the side of the pulk failed when I tested its strength.
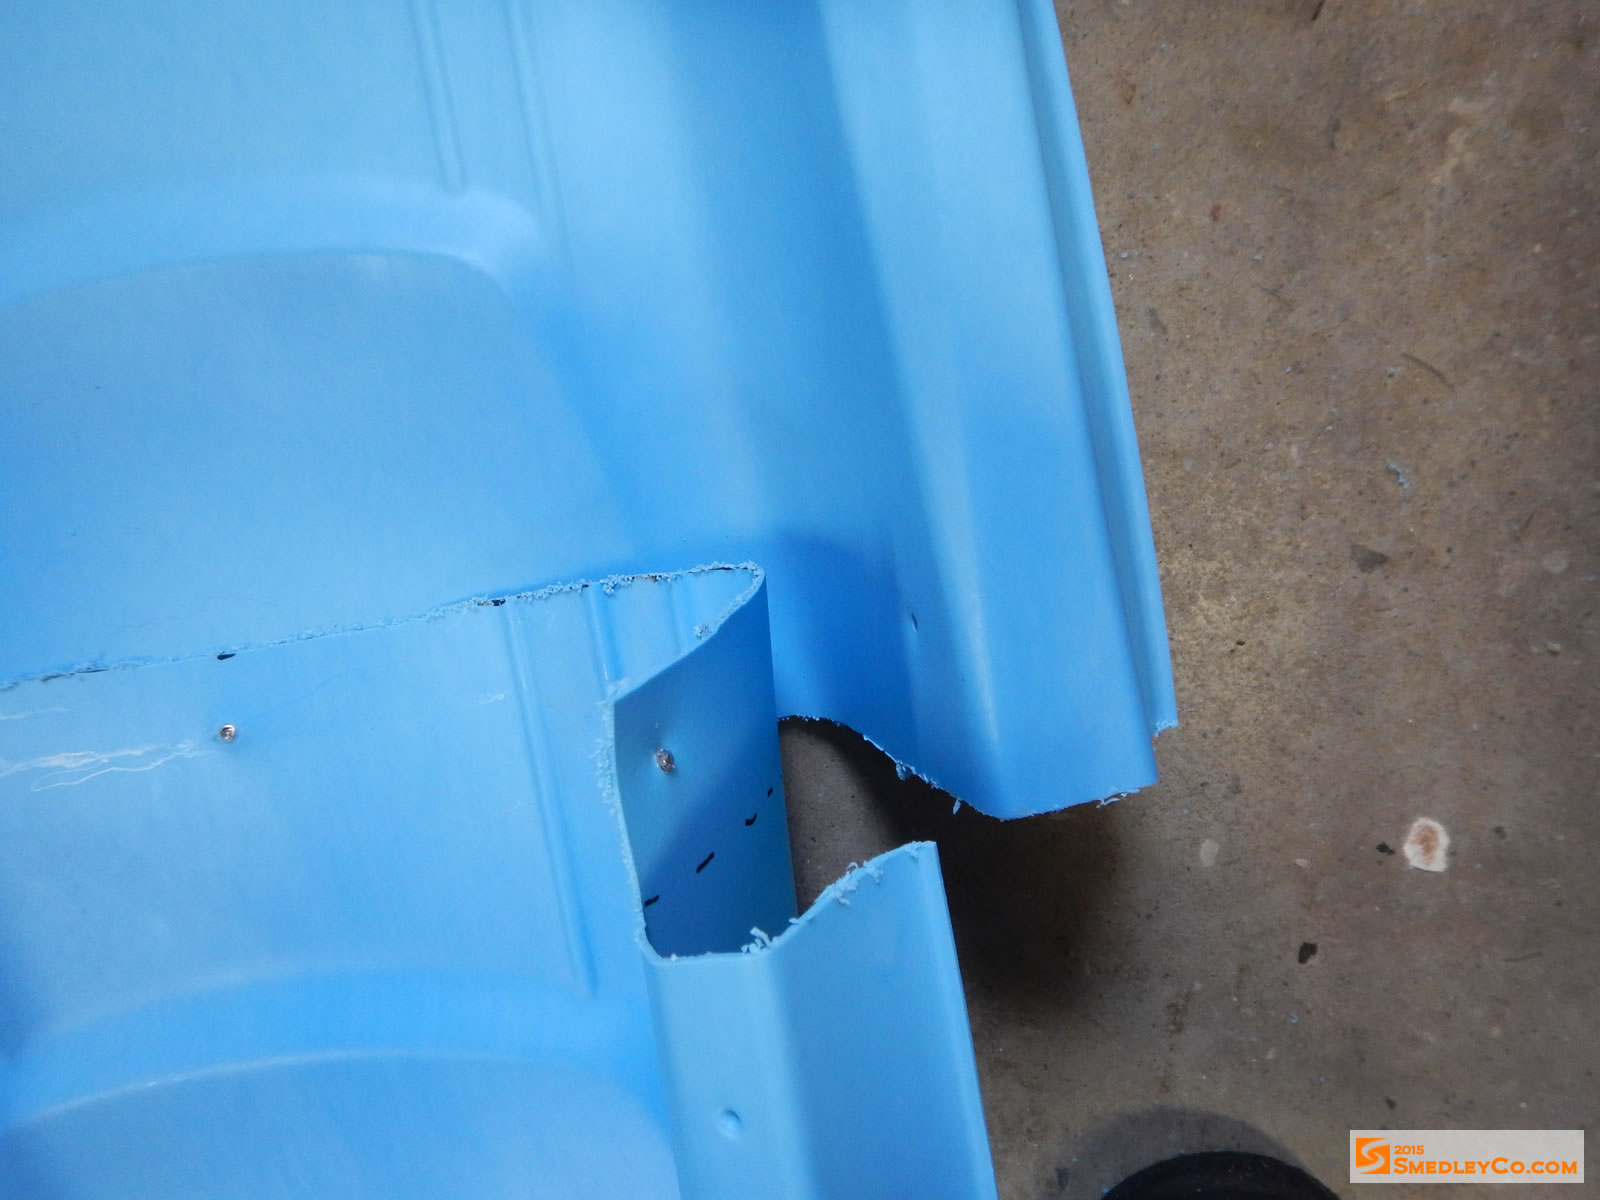
Flaw found. Rivet pulled out of soft, thin plastic.
After cursing about that for a minute, I sat down and put my thinking cap on. Deciding the soft plastic was just too thin for the rivet I came up with the idea of putting a backing on the rivet. I cut some junk pile aluminum into short sections that would hold two rivets. That seemed to work well and I got started, one section on each edge and two for the bottom.
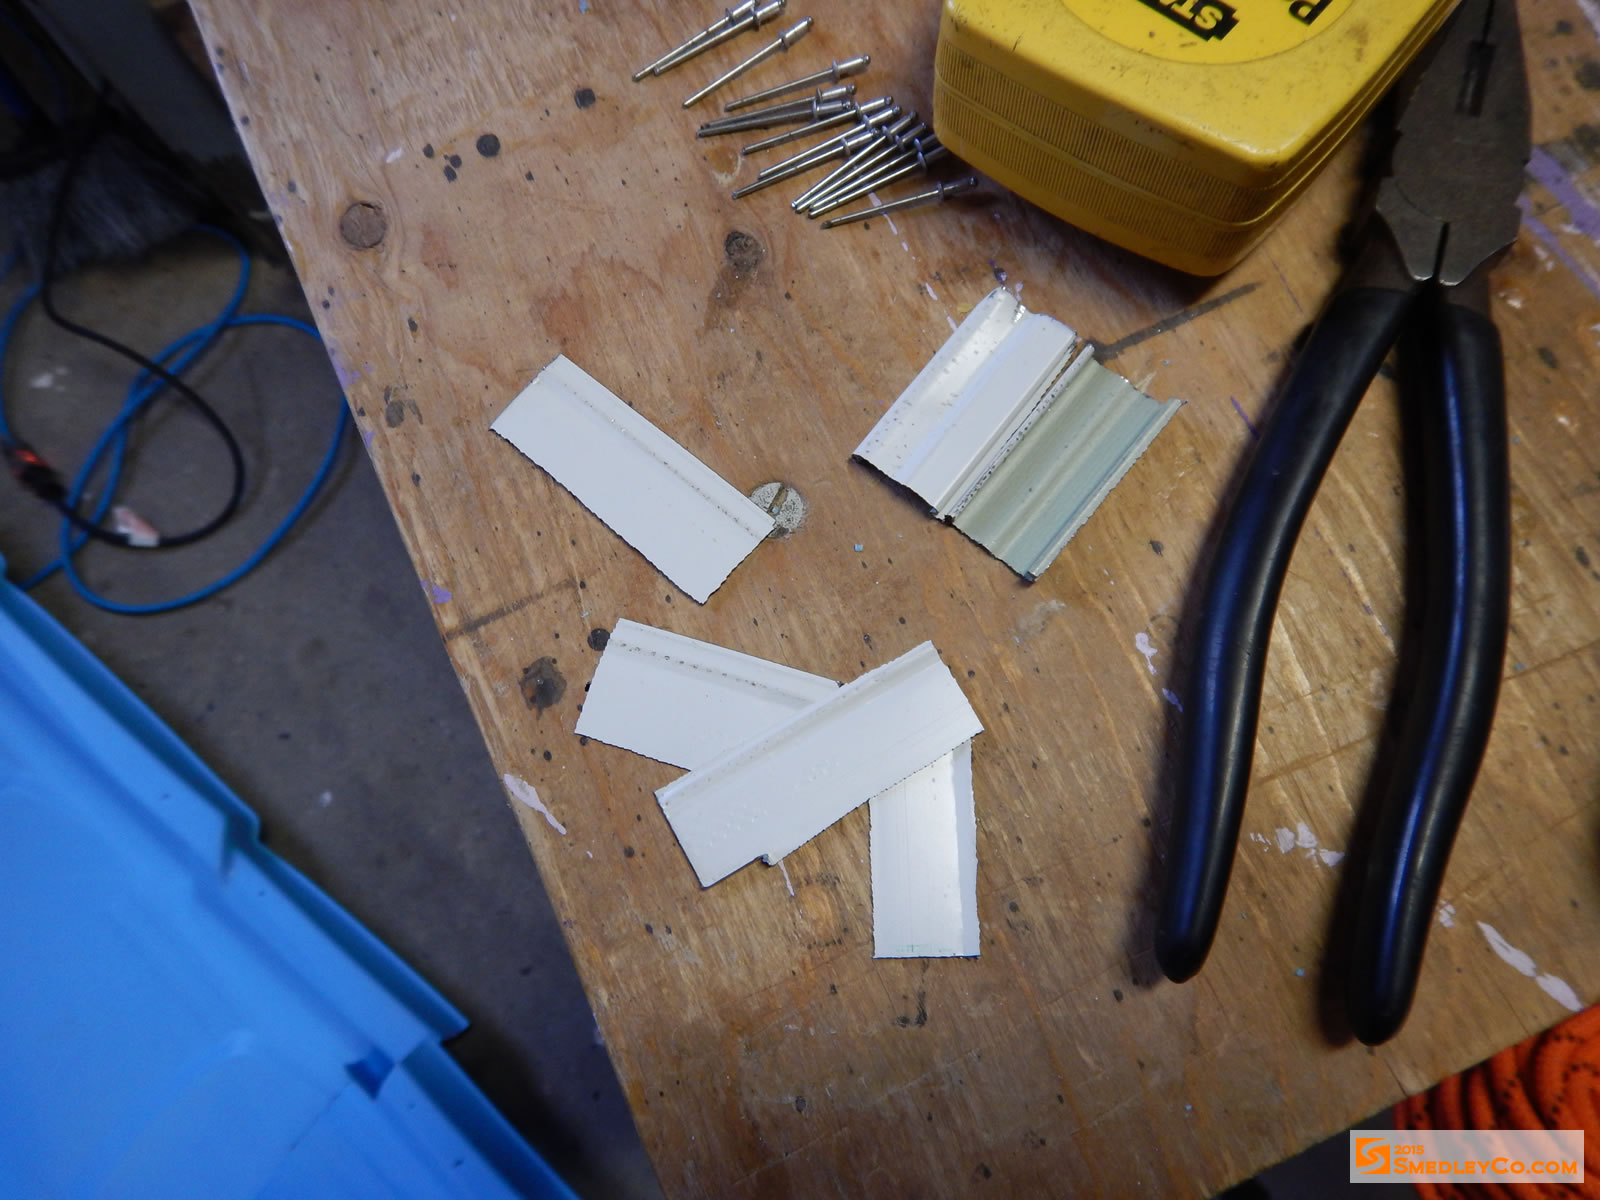
Scrap metal became reinforcing back plates.
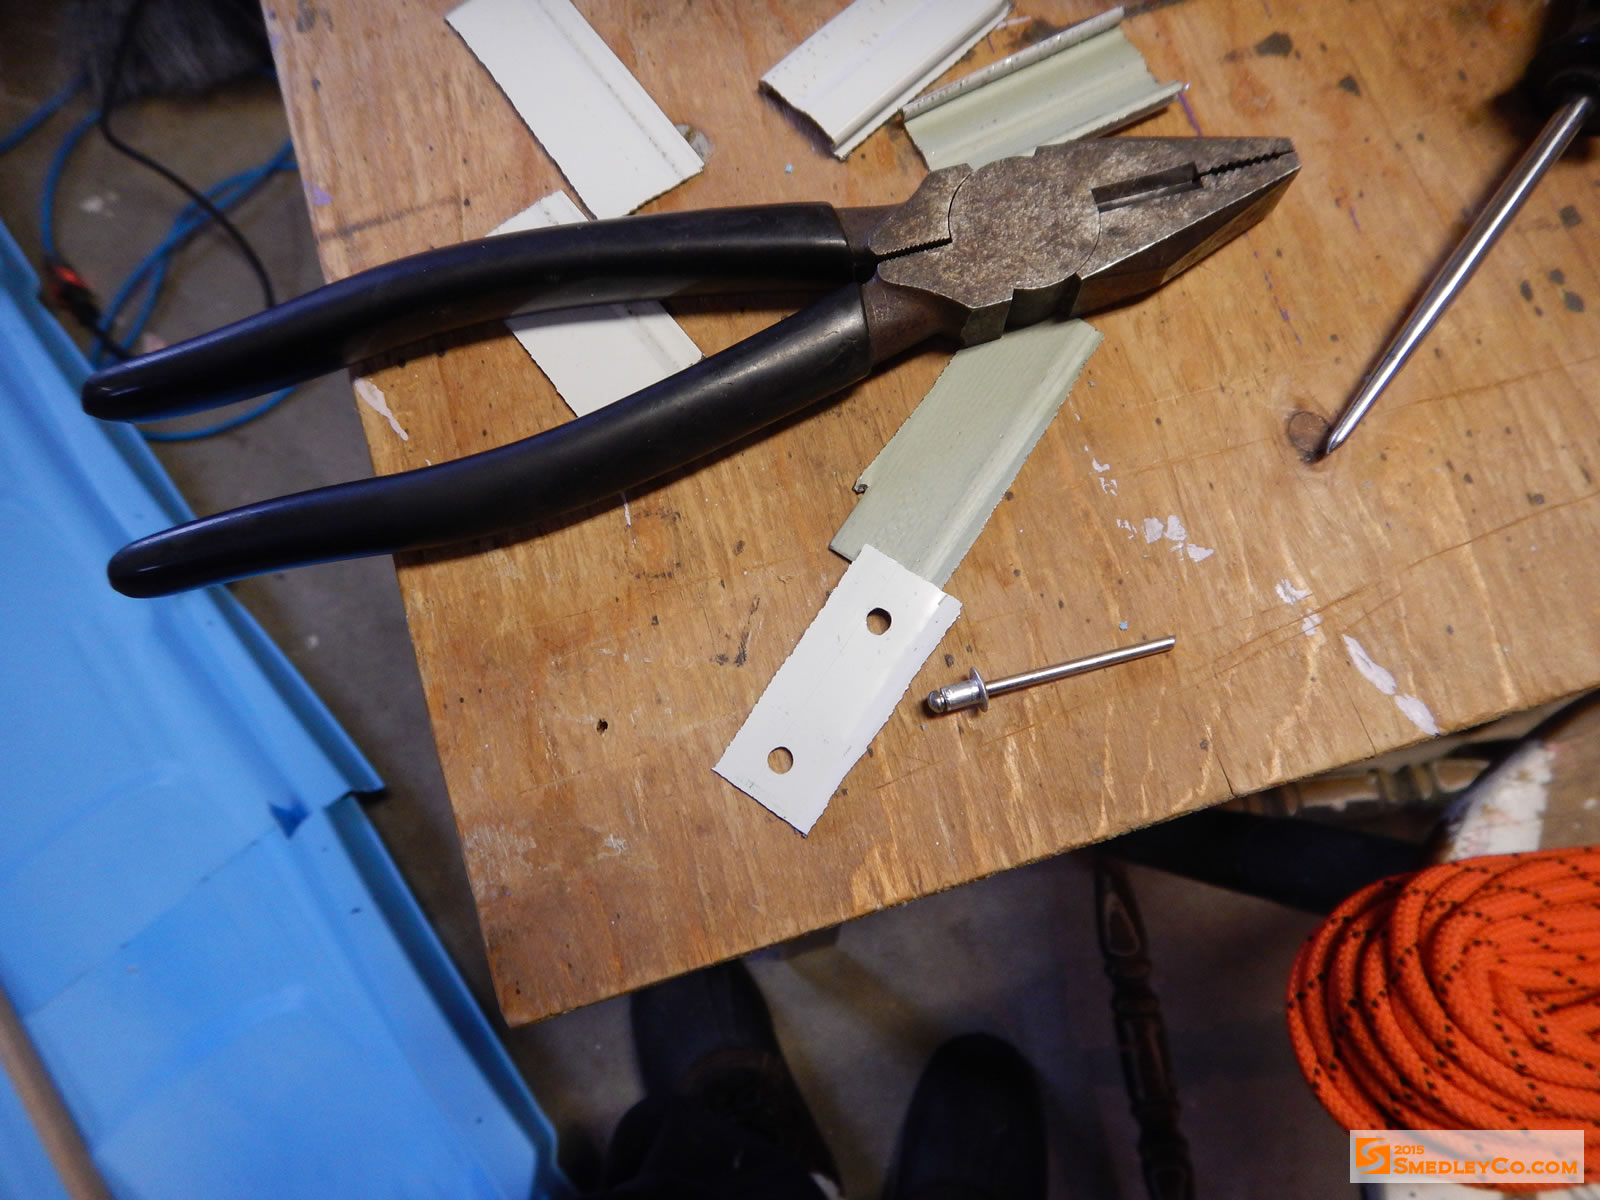
Completed back plate for two rivets.
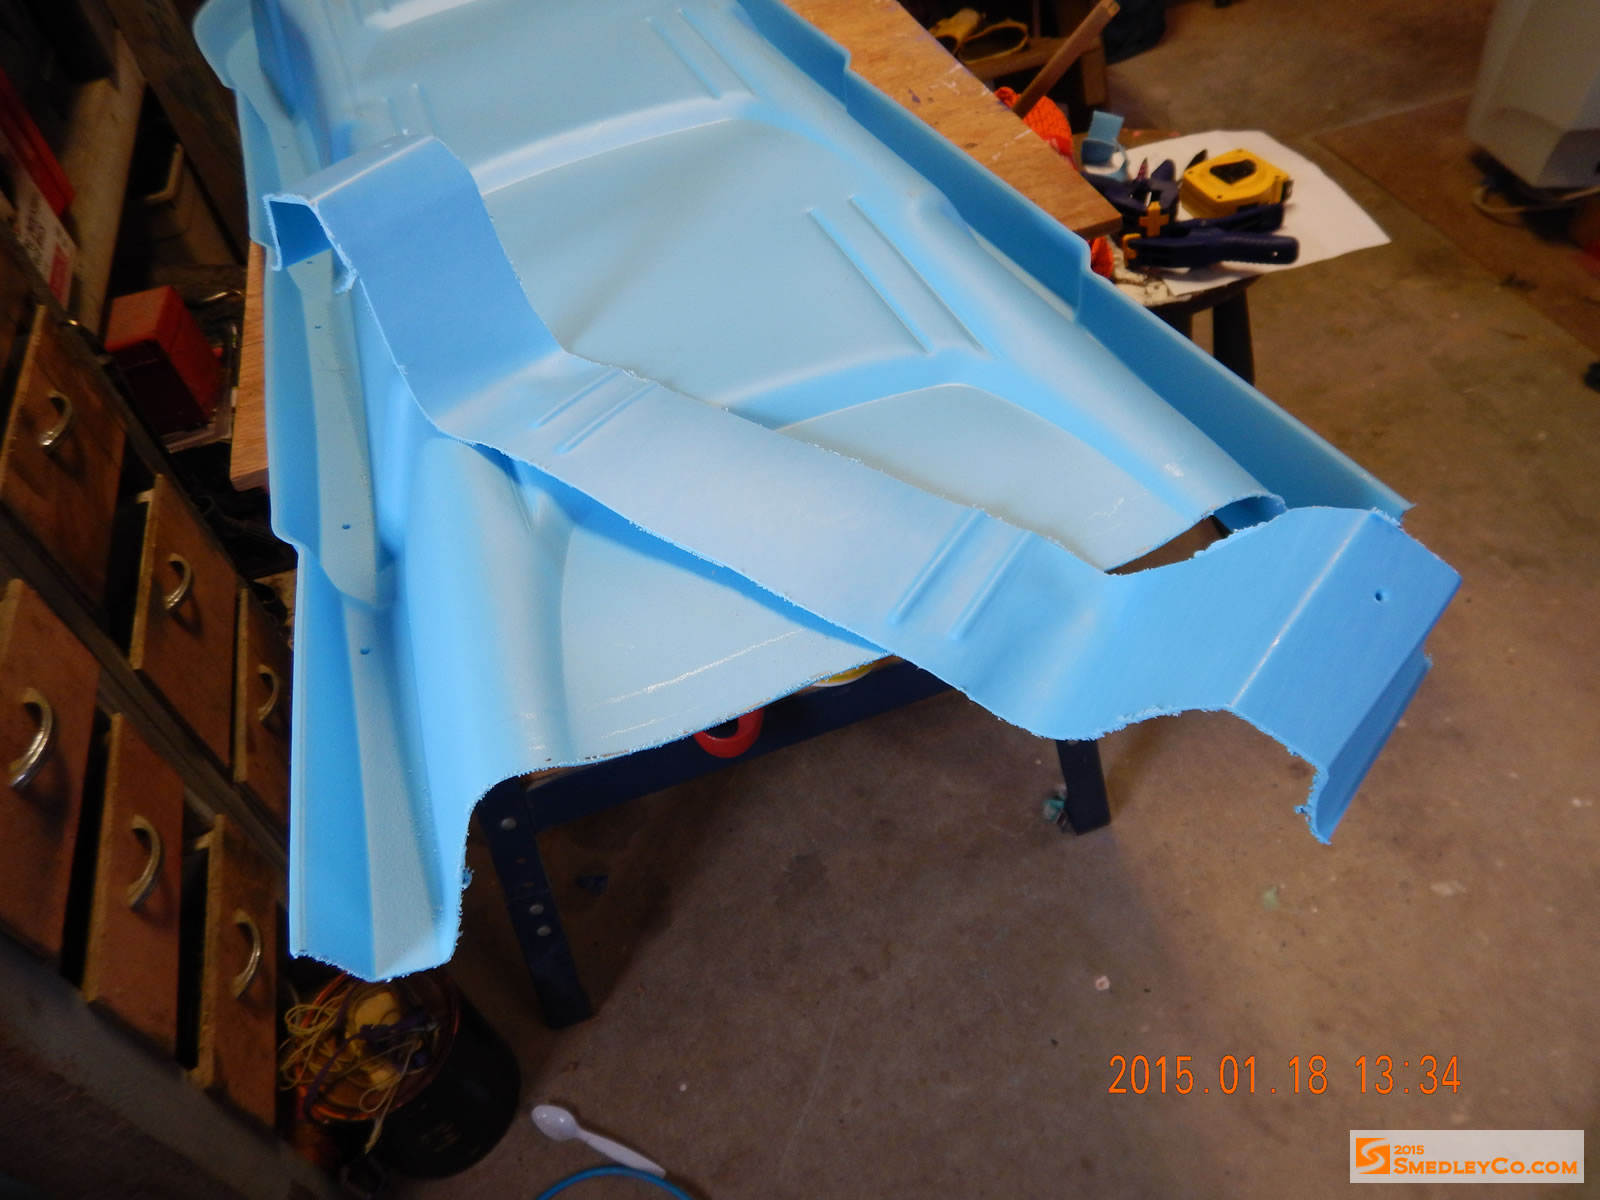
The two halves joined together. Front view.
The backer plate riveted under the side of the pulk.
I don’t know how much it matters in the grand scheme of things, but I thought it was worth getting the bottom of the pulk straight. There are grooves and I didn’t want the pulk to always be pulling to one side like a wonky grocery cart.
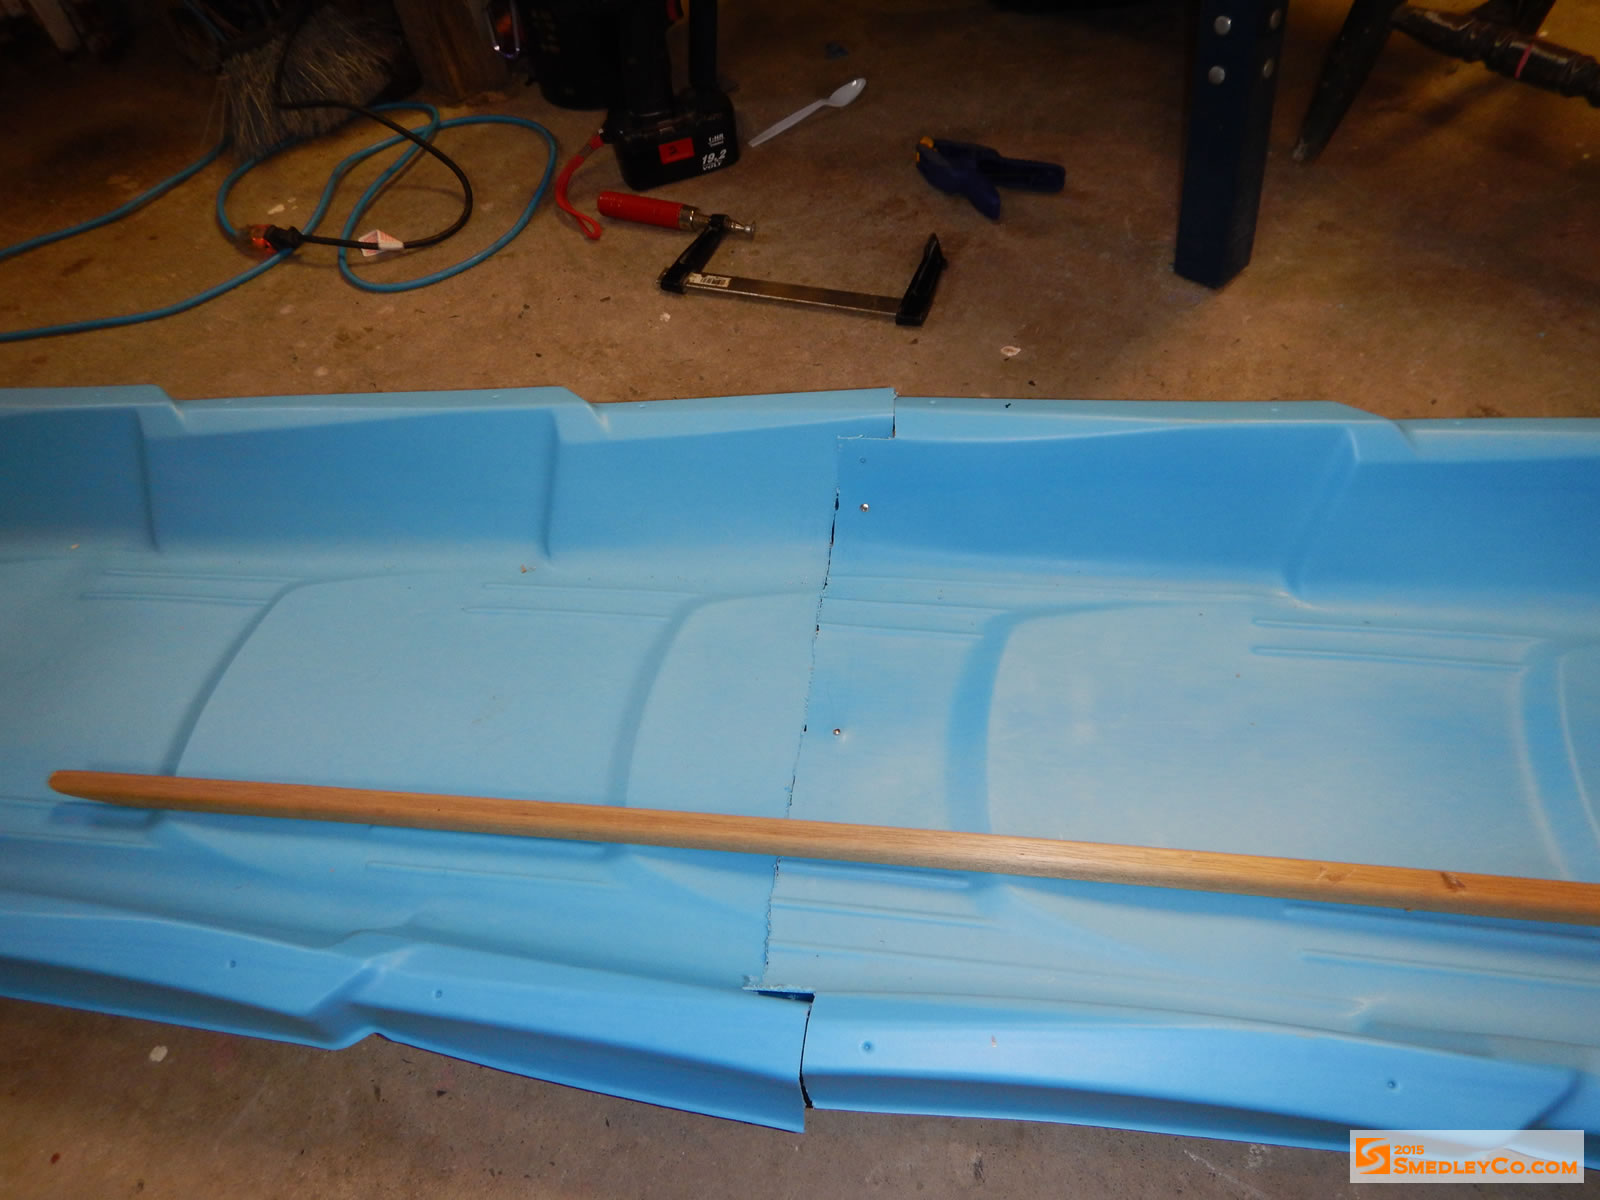
Trying to get a straight bottomed pulk.
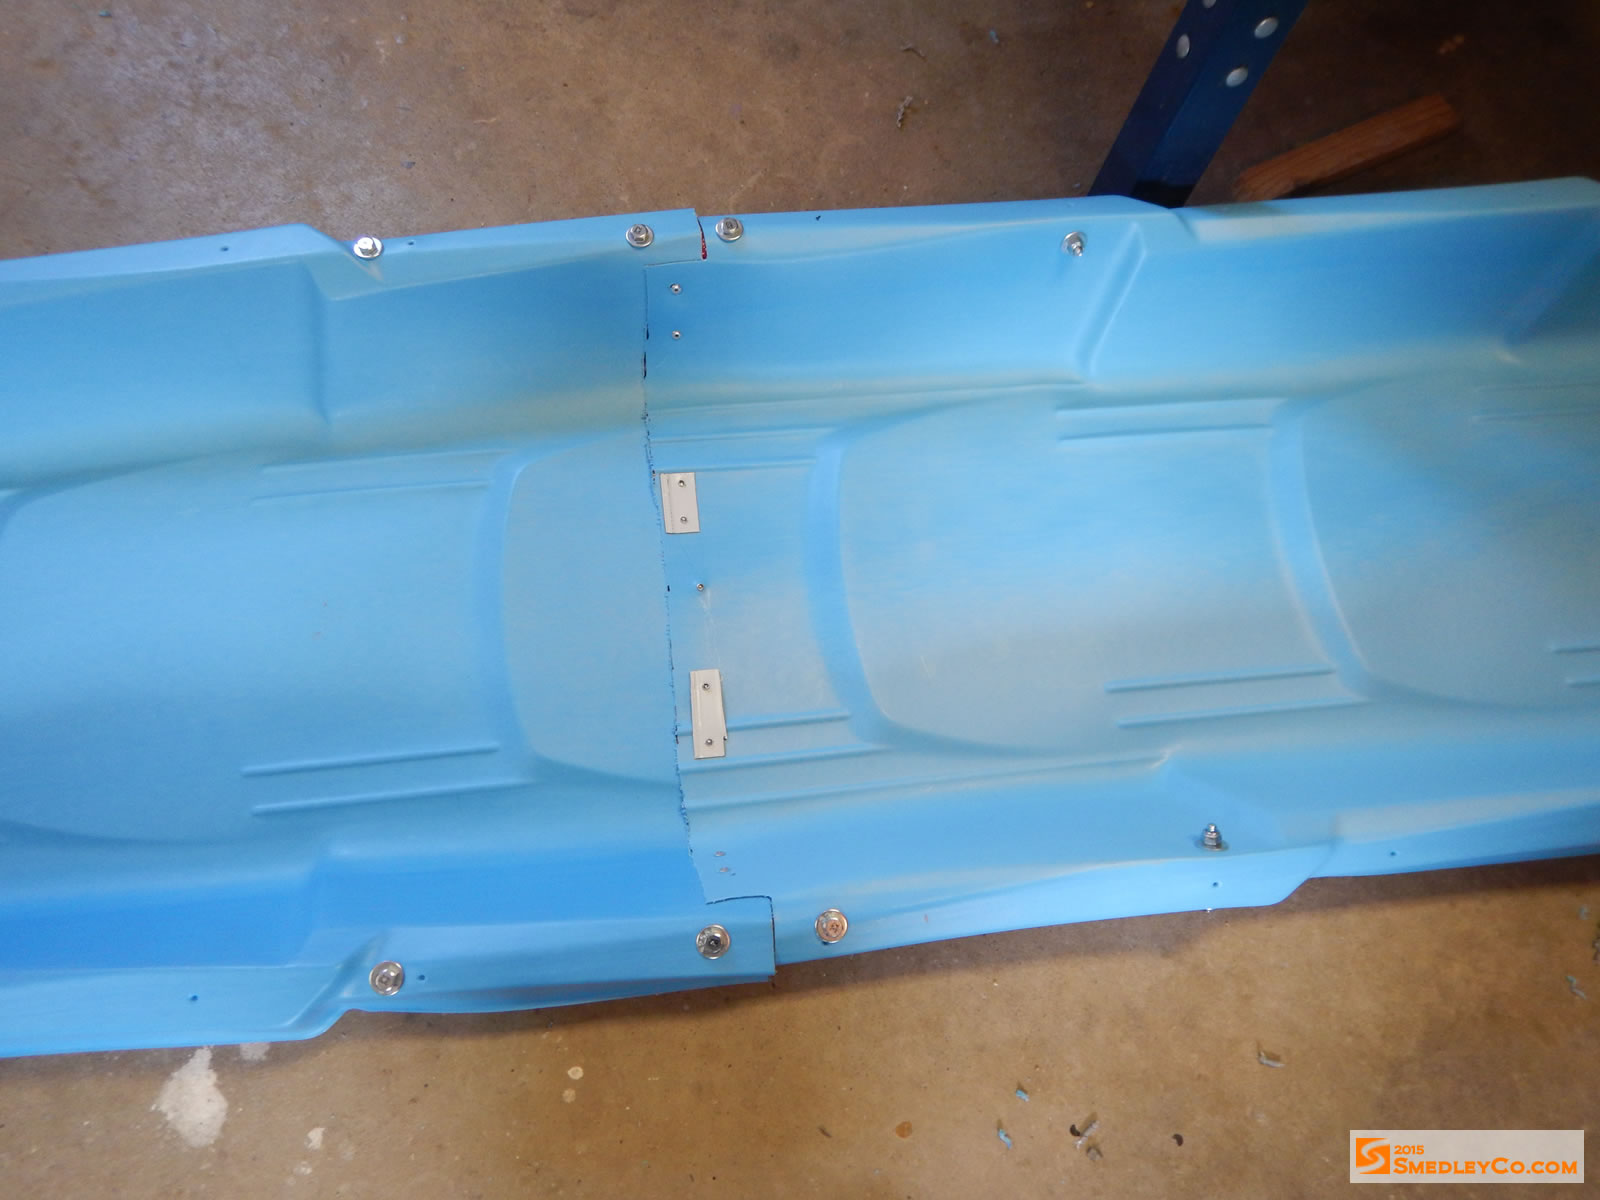
Once I was satisfied I wouldn’t be pulling myself around in circles I put two rivet strips on the bottom joint, this time placing the metal pieces on the inside to keep the bottom hull smooth.

Bottom of pulk riveted together inside the pulk.

View of the bottom of the pulk where the halves are joined.
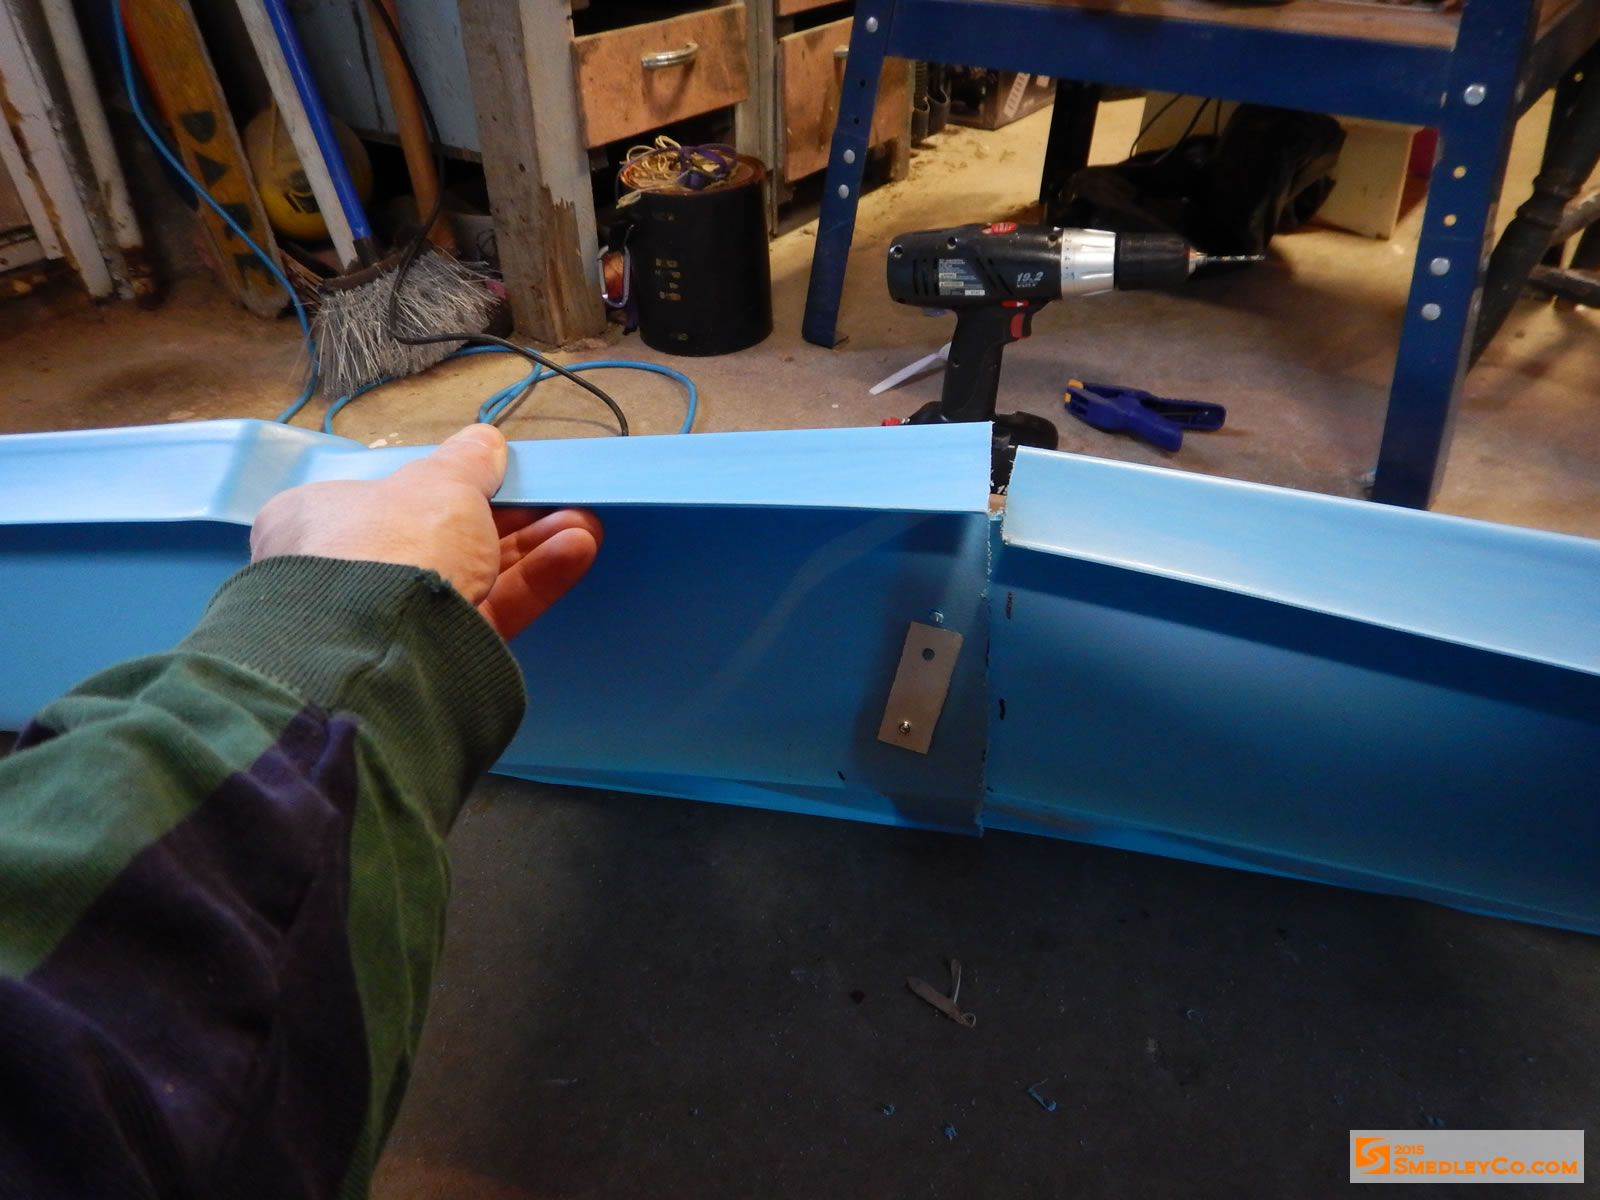
I now had a pulk that was nice and long, about 8 feet! But since I hadn’t started with exactly a completely finished plan I of course discovered the next flaw in my concept. The joint where the two halves met seemed a little flimsy. With just a few rivets in soft plastic I was worried about failure. For example, giving a good tug and having two pieces again. I decided that some reinforcement here would be a good idea.
After sitting in the thinking chair for a while I came up with a plan. Some conduit from the leftovers pile could be bolted in to strengthen this area, the molded fold of the side fit the length of pipe perfectly. And since a bit of duct tape never hurt anything I threw some in there to make the joint smooth.
Using conduit to strengthen the joint.
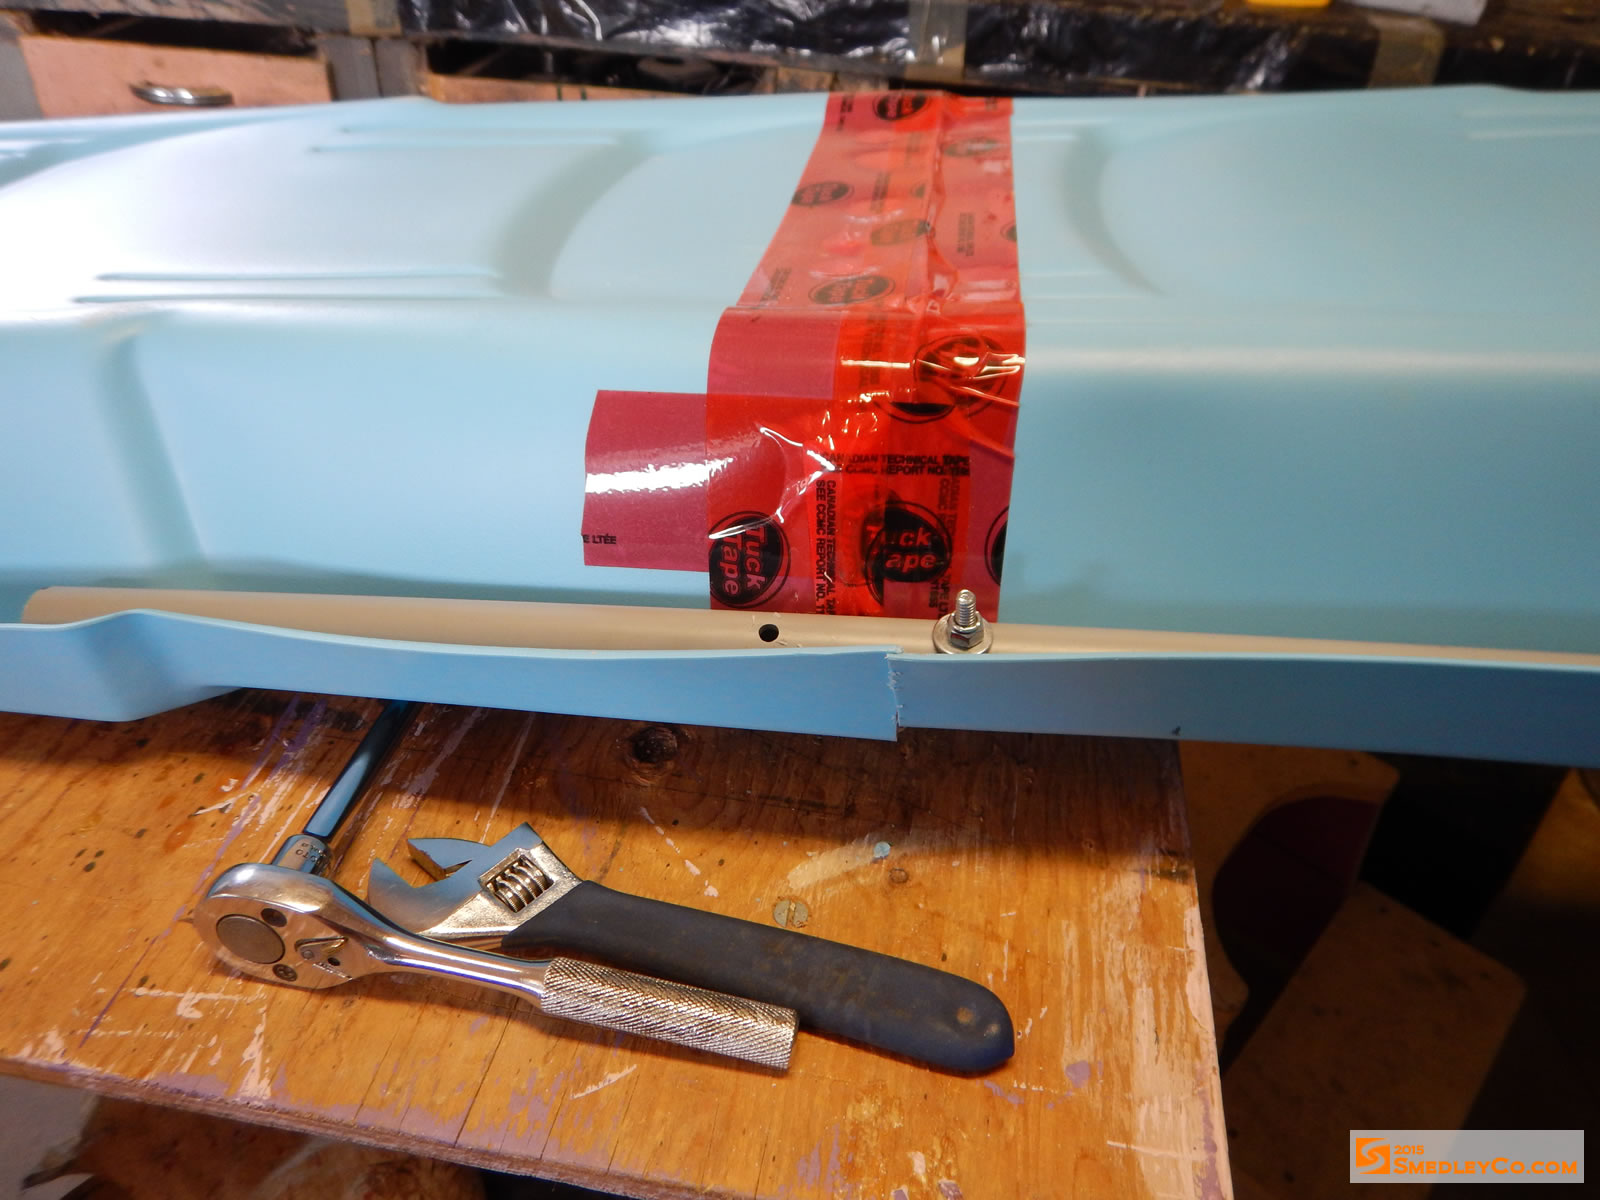
Duct tape always helps.
Four bolts per side and things were looking good. Even if some rivets blew out the conduit should hold the pieces together fine. I wouldn’t end up stranded and could likely install emergency repairs and make it out of the woods alive.
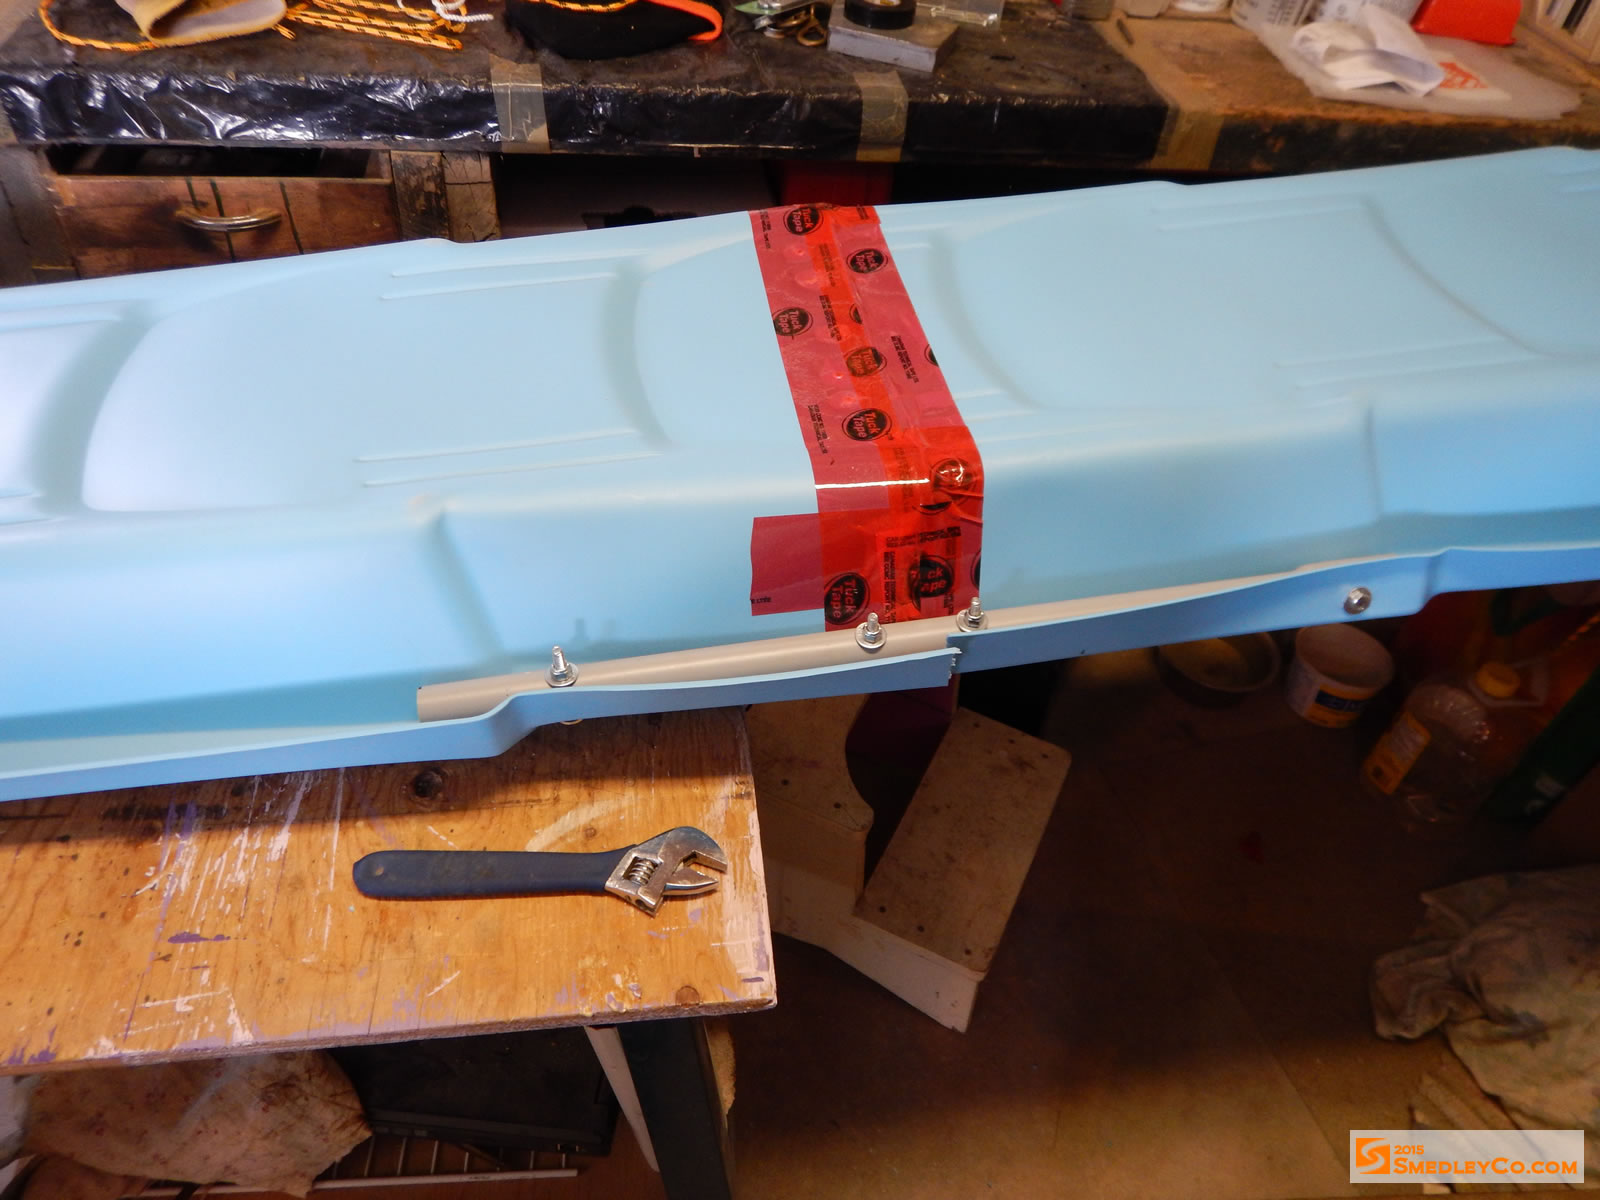
Complete. Should be safe enough for the backcountry.
A good look at the joint on the top side of the pulk.
After a quick test run of the joined together pulk I was pretty happy. Not bad for a cobbled together DIY pulk. I decided to christen it “The Corpse Remover”, since it was long enough to transport a body.

Out for a quick field test of the Mega-Pulk.
Read my winter camping trip reports.
Another Winter Camp on Pinetree Lake
DIY Mega Pulk
Jump To...
Toboggans.
Slice/Dice.
Join Halves.
Improvements.
Poles.
Camping!
Winter Camping Information
Friends of Algonquin Park- Winter Page
Algonquin Adventures
- Winter Page
Algonquin Weather